
Righteous Verdict in Crimson Desert: where the quest sits in the campaign
The Righteous Verdict quest in Crimson Desert is one of the named story beats that Pearl Abyss placed in the middle act of the campaign, after the player has traveled across Pailune and into the contested border region around Hernand. Mechanically, it pulls together three threads that the rest of the game tends to keep separate: a small trial-style combat encounter, a dialogue branch that asks the player to commit to one of two local factions, and a reward tier that scales with the player’s current gear score. Because of that mix, players regularly look for a guide that explains not only how to clear the encounter, but also how the choice they make inside it feeds back into the open-world state around them.
This page treats Righteous Verdict as a single quest within Crimson Desert rather than as a review of the whole game. The goal is to give a returning player a clean walkthrough of the fight, explain the two faction outcomes the player can lock in, and call out the build considerations that matter most if the player plans to revisit the encounter at a higher difficulty. Where Crimson Desert is broader than this quest, the official Wikipedia summary of the Crimson Desert entry is the right place to look for general release, platform, and engine context.
It also helps to know what the quest is not. Righteous Verdict is not a secret encounter hidden behind an obscure NPC, and it is not a late-game boss fight that requires a fully upgraded build. It is a mid-arc quest with a clear marker, a short arena, and a single decision point. That framing matters because a lot of the confusion players report comes from treating the encounter as something larger than it is, then walking in unprepared for the rules variation that the arena uses to gate its difficulty.
How Righteous Verdict is triggered
Righteous Verdict is not given by a generic notice board. It is part of the personal questline for Kliff’s company after the events of the border skirmish at Greysand Pass, and the trigger is tied to a specific conversation in the camp near Stoneford. Three conditions are commonly reported by players who have reached the quest reliably:
- The border arc at Greysand Pass must be resolved, including the side objective to recover the merchant ledger from the ruined watchtower.
- Kliff’s personal affinity must be at the second rank, which is usually achieved through two campfire conversations and one optional contract board task at Stoneford.
- The player must have entered the Hernand arena district at least once, either by riding through the southern gate or by fast traveling from any unlocked waypoint in the region.
If any of those three conditions is missing, the quest marker for Righteous Verdict does not appear on the map, even if the player has already spoken to the judge NPC in the arena. The cleanest fix is to backtrack to Stoneford, complete the missing contract board task, then return to the arena. The trigger is intentional rather than a bug, and it is one of the ways Pearl Abyss ties progression to character affinity rather than to a simple level gate.
Two smaller details tend to trip players who are close to triggering the quest. The first is that the contract board task at Stoneford counts only when the player turns the contract in, not when the player accepts it, so a half-finished contract looks complete in the log but does not raise affinity. The second is that the Hernand arena district has a soft entry trigger, meaning the player has to physically cross the district line, not just look at the area from a nearby ridge, before the quest marker is willing to attach itself to the player’s map.
The arena layout and what changes between visits
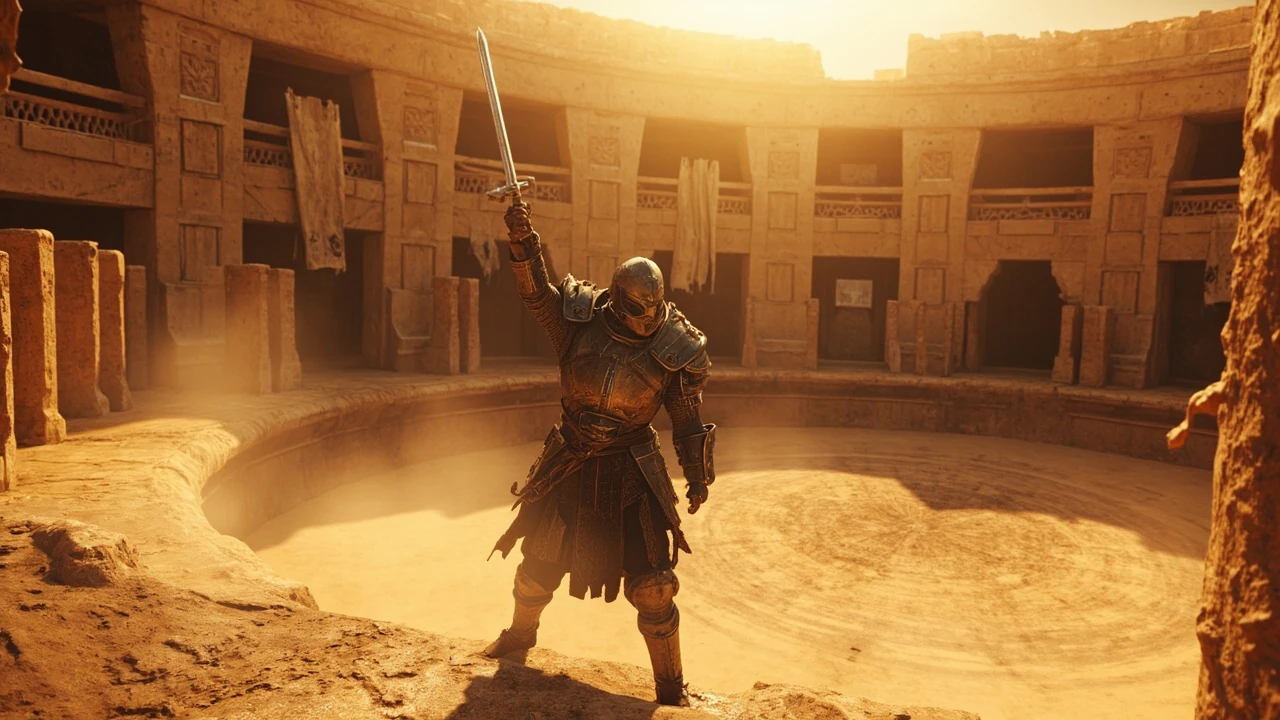
The Righteous Verdict encounter takes place in a circular arena roughly 60 meters across, with three raised platforms, a central dueling ring, and two narrow entry tunnels used for the scripted entrances. The geometry does not change between difficulty settings, but the opponent roster, the trap placements, and the reward tier do. The two most important things to read before the fight are the banners on the entry tunnel and the state of the central ring.
If the banner hanging over the northern tunnel shows the Black Lion sigil, the fight uses the standard “trial by witness” rules, and the player is allowed to use healing items, spirit summons, and mounted combat. If the banner instead shows the Red Thorn sigil, the encounter has shifted to the harsher “trial by ordeal” rules, and the player is restricted to melee weapons, a single ranged sidearm, and no consumables. Reading the banner before entering prevents the most common cause of failed runs, which is a player walking into an ordeal fight with a build tuned for witness rules.
The central ring is the second thing to read. A clean ring with fresh sand means the fight starts from a neutral state and the player has the standard 5-second pre-fight window. A ring with scuff marks and a half-buried weapon means the previous duel was not resolved cleanly, and the player is dropped straight into the opening wave without the pre-fight window. The scuffed ring state is rare, but it shows up on replays when the player exits the encounter without speaking to the judge NPC, and it explains why some replays feel rushed compared to the first run.
Combat walkthrough: the opening exchange
For most players, the opening exchange decides the rhythm of the entire fight. Righteous Verdict always begins with a scripted dialogue between Kliff and the judge NPC, then a 5-second window where the player is allowed to draw a weapon, drink a potion, or summon a mount. After the window closes, the first wave spawns: a mix of two elite arena guards and three to five standard soldiers. The standard soldiers use the same AI as the open-world border troops, but the elite guards have a heavier guard break and a longer reach on their overhead strike.
The intended approach is to thin the standard soldiers first using a mid-range weapon such as a crossbow or a thrown blade, then focus the two elite guards one at a time. The elite guards share a damage aura while both are alive, so fighting them as a pair slows the player’s weapon swing and stamina regeneration. As soon as the first elite guard falls, the aura drops, and the second elite guard can be finished with the same combo the player has been using on the standard soldiers.
A small timing detail helps on the first wave. The elite guards do not start their shared aura until the player has taken or dealt a hit inside the ring, which means the player can use the first few seconds of the fight to land a free guard break on one of the standard soldiers. The aura then activates on the first real hit, but by that point the standard soldiers are already thinning out, and the rest of the wave plays closer to a one-on-one fight than a two-on-one.
Combat walkthrough: the second wave and the named opponent
After the first wave is cleared, a short cinematic introduces the named opponent for Righteous Verdict, who is either Castan of the Black Lion or Irel of the Red Thorn depending on the banner shown earlier. Both opponents share a moveset based on heavy two-handed weapons, but their tells are different enough to plan around.
| Opponent | Signature weapon | Main tells | Suggested punish window |
|---|---|---|---|
| Castan of the Black Lion | Greataxe with a curved head | Two-handed overhead that flashes white at the tip | After the overhead lands, a 1.2-second recovery before the horizontal swing |
| Irel of the Red Thorn | Long sword and parrying dagger | Low thrust followed by a quick step | After the thrust, a 0.8-second opening if the player dodges to the side rather than back |
The second wave also brings two arena hounds, which are weaker individually than the elite guards but apply a bleed effect that stacks with subsequent hits. The cleanest way to clear the second wave is to interrupt the named opponent’s opening move, dash to one of the side platforms to reset aggro, and let the hounds follow. The hounds are easier to manage on a platform because they cannot use their leap attack on elevated ground, while the named opponent has to walk the ramp, which is a predictable punishable moment.
For the second wave specifically, a useful sequence is:
- Interrupt the named opponent with a guard break at the start of the fight, then disengage to the nearest platform.
- Kill the two arena hounds while they climb the ramp, using a single heavy attack per hound once they commit to the leap animation.
- Drop back to the central ring, bait the named opponent’s signature move, and punish during the recovery window shown in the table above.
- Repeat the bait-and-punish cycle until the opponent enters the staggered state at roughly 40 percent health.
The staggered state is the only safe moment to use an ultimate ability or a fully charged spirit art, because the named opponent is immune to stagger during the first 60 percent of the encounter and the game plays a distinct audio cue when the immunity ends. Missing that window is the single most common reason for an otherwise clean run to drag on longer than it should, because the player ends up trading hits during the immune phase and running out of healing items before the opponent is actually vulnerable.
The faction choice and how it affects the open world
Once the named opponent is defeated, the judge NPC opens a dialogue that asks the player to declare which faction will hold the arena district. The two options are the Black Lion, which favors trade caravans and lower taxes, and the Red Thorn, which favors militant patrols and a stricter justice system. The choice is presented as a single decision with no immediate reversal, although a later quest called A Second Hearing can be used to revisit the arena under different terms.
| Outcome | Black Lion holds the arena | Red Thorn holds the arena |
|---|---|---|
| Caravan frequency in the surrounding region | Increases, with one extra merchant route per in-game day | Decreases, with patrols replacing merchant traffic |
| Player access to arena duels | Unlocked for both standard and ranked modes | Unlocked for ranked mode only, with a higher entry fee |
| Vendor stock at Stoneford | Adds a small selection of trade goods and curios | Adds weapon sharpening stones and armor repair kits |
| Effect on Kliff’s affinity | Neutral, with a small positive bonus if the player reads the related journal entry | Negative if the player chooses Red Thorn without first reading the journal entry |
The two outcomes are not framed as a moral choice in the dialogue itself. The judge NPC explains the practical consequences in plain terms, and the player is allowed to ask follow-up questions before committing. Most players who want to keep the open world calm choose Black Lion, while players who want a faster pipeline to weapon upgrades choose Red Thorn because of the repair kit stock at Stoneford.
It is also worth noting that the faction choice has a delayed effect on the rest of the Hernand region. Caravan traffic and patrol density do not change until the player has left the arena and returned to the surrounding map, which means the immediate aftermath of the choice can feel unchanged. The first real signal of the choice is the new NPC dialogue at the Stoneford vendor, which is also where the player sees whether the journal entry has been read in time.
Rewards, scaling, and what to do with the outcome
The rewards for completing Righteous Verdict scale with the player’s current gear score, but the loot table is fixed. Every successful run grants one of three named weapons, one piece of arena-themed armor, and a faction token that can be exchanged for either Black Lion or Red Thorn rewards at the appropriate vendor. The named weapon and the armor piece are awarded from a small pool, so the exact item is not guaranteed across runs.
The faction token is the most interesting part of the reward, because it is the only item in the encounter that the player cannot get from any other quest. The token unlocks a small reputation track with the chosen faction, and that track gates two follow-up contracts, three vanity items, and a single house upgrade. Players who want to plan around the token should treat the choice less as a moral decision and more as a decision about which of the two vendor pipelines they prefer to interact with for the rest of the play session.
The named weapons themselves also have a small follow-up effect. Each of the three possible weapons is tied to a separate contract board task at Stoneford, and the contract is only offered after the player has held the weapon for at least one in-game day. The contracts reward upgrade materials rather than new weapons, which means the named weapons act as a long-term investment in the player’s upgrade path rather than as a one-time prize.
Common failure modes and how to avoid them
Righteous Verdict is not a hard encounter by the standards of Crimson Desert’s late game, but it has a few specific failure modes that the in-game telegraphing does not always make obvious. The four most common are listed below in the order they tend to happen in a fresh run:
- Entering under the wrong banner. The most common reason for a failed first run is the player reading the northern banner as a cosmetic detail and walking into an ordeal fight with a build tuned for the witness rules.
- Fighting the two elite guards as a pair. The shared damage aura cuts stamina regeneration and slows the player’s swing, which turns a winnable first wave into a slow loss.
- Spending the ultimate ability on the first 60 percent of the named opponent’s health bar. The opponent is immune to stagger in that window, and the ability goes on cooldown without dealing real damage.
- Committing to a faction without reading the related journal entry. The choice is reversible through A Second Hearing, but the reversal costs a small amount of reputation, and most players prefer to avoid that extra step.
Each of these failure modes has a clear in-game signal, and a careful player can usually identify which one is causing a run to fail within two attempts. The banner at the entrance, the shared aura on the elite guards, the audio cue when the named opponent’s stagger immunity ends, and the journal entry that appears in the player’s log after the first dialogue with the judge NPC are all reliable cues. Once a player has read the cues once, the rest of the run tends to fall into place, which is part of why the encounter is a popular early stop on a first playthrough.
A fifth failure mode shows up on replays rather than first runs, and it is worth flagging here. Players who leave the arena without speaking to the judge NPC after a failed run will find the central ring scuffed on the next attempt, which removes the 5-second pre-fight window. The scuffed ring state is easy to miss because it is purely visual, but it explains why a second attempt can feel like the game skipped a step.
Build considerations for repeated runs
Because Righteous Verdict is short and self-contained, it is a popular target for repeated runs, especially by players who want to farm the named weapons or push their arena rank. Two build directions are worth considering before the second run, and the choice between them depends on whether the player plans to stay in the witness rules or to push into the ordeal rules.
| Build direction | Best weapon type | Best secondary | Why it works |
|---|---|---|---|
| Witness rules, sustain build | Long sword with a parrying dagger | Healing chime and a single spirit summon | Allows the player to absorb the second wave’s bleed and recover between staggers, which keeps the run short and consistent. |
| Ordeal rules, burst build | Greataxe with a heavy crossbow | No consumables, single ranged sidearm only | Focuses the run on interrupting the named opponent’s opening move and punishing the recovery window, which fits the no-consumable restriction. |
Players who want to use the encounter as a build test should clear it once on the witness rules, then switch their secondary set and try the ordeal rules on the second pass. The two rulesets reward different timing windows, and the transition is one of the cleaner ways to learn how Crimson Desert expects the player to read an opponent’s tell before committing to a punish. For a broader critical look at how the campaign frames these mid-arc decisions, Press Start’s review of Crimson Desert covers how the arena quests sit inside the larger campaign rhythm, and reading the two pieces back to back gives a clearer picture of the encounter’s role than either does on its own.
One practical note on gear score scaling: the loot tier does not change between rulesets, which means the ordeal rules are a better farming target for players who already have a strong build. The witness rules remain the right choice for players who are still working through the mid-game, because the healing chime and spirit summon give a wider margin for error on the first few attempts.
How Righteous Verdict compares with similar arena quests
Righteous Verdict is one of three named arena quests in the Hernand region. The other two are The Long Counting, which is a wave-survival encounter with no dialogue branch, and The Burned Ledger, which is a stealth quest that ends with a single duel rather than a faction choice. A short comparison is useful for players who are choosing which of the three to clear first.
| Quest | Main challenge | Outcome structure | Best reason to clear it first |
|---|---|---|---|
| Righteous Verdict | Mixed combat and dialogue | Two faction outcomes with reversible follow-up | Best entry point because it teaches the arena’s banner rules and pacing. |
| The Long Counting | Sustained wave survival | Single reward tier, no faction effect | Good for farming the named weapons without committing to a faction. |
| The Burned Ledger | Stealth followed by a single duel | Single outcome that unlocks a side vendor | Good for players who want the vendor unlock without the arena ranking grind. |
The cleanest order for a first-time player is Righteous Verdict, then The Long Counting, then The Burned Ledger, because that order matches the difficulty curve and the player’s familiarity with the arena’s rules. Skipping straight to The Burned Ledger is possible, but the stealth section is harder to read on a first visit because the player has not yet seen the arena’s patrol patterns from the combat side.
Players who are mainly interested in the named weapons should also note that The Long Counting is the only one of the three quests that does not require a faction commitment. That makes it a useful fallback for players who want to keep their faction options open until they have read the related journal entries, and it explains why the three quests are often discussed together rather than as standalone encounters.
What Righteous Verdict tells us about Crimson Desert’s quest design
Righteous Verdict is a useful example of how Pearl Abyss has designed the middle of Crimson Desert’s quest tree. The encounter is short, but it pulls together three systems that the rest of the game tends to keep separate, and it asks the player to read the room before committing to a decision. For players who care about quest design rather than just quest outcomes, the encounter is a useful case study in how a single quest can act as a tutorial for a region’s mechanics without feeling like a tutorial.
For a broader critical look at how the campaign frames these mid-arc decisions and how the rest of the open world responds to them, a useful companion read is the Crimson Desert review on Press Start, which goes into more detail about how the arena quests sit inside the larger campaign rhythm. The two pieces do not overlap directly, and reading them in order gives a clearer picture of the encounter’s role than either does on its own.
The same design pattern shows up in two other places in the campaign, which is why Righteous Verdict is a good introduction to the rest of the arena content. Once a player has cleared it once, the banner rules, the elite guard aura, and the stagger immunity window all become familiar cues, and the rest of the Hernand region is easier to read on the first visit because the player already knows what to look for. That carry-over effect is part of why the encounter is a common reference point in community guides, even though it is not the longest or the most rewarding quest in the region.
Quick checklist before starting the encounter
Before walking into the arena for the first time, it is worth running through a short checklist. The items below are not mandatory, but each one removes a small source of friction from the run and keeps the player focused on the fight rather than on the menu.
- Confirm the banner at the northern tunnel and pick the matching rule set for the current build.
- Stock the appropriate consumables: healing items for witness rules, sharpening stones for ordeal rules.
- Check Kliff’s affinity rank and the related journal entry, because the faction choice is cleaner if both are in place before the dialogue opens.
- Mark the side platforms on the map, because they are the safest place to reset aggro during the second wave.
- Note the audio cue for the named opponent’s stagger immunity, because it is the only reliable signal that the ultimate ability will land.
None of these steps guarantees a clean run, but together they cover the most common failure modes and let the player focus on the actual combat. The encounter is short enough that a second attempt is rarely a heavy cost, and the repeatable nature of the arena is one of the reasons Righteous Verdict is a good early stop on a first playthrough.
Players who want to push for a faster arena rank can also add two more steps to the checklist: clear the standard soldiers with thrown weapons before drawing the primary, and end the fight with a fully charged heavy attack on the staggered named opponent. Both steps shave a small but consistent amount of time off the run, and the arena rank system rewards clean finishes more than fast openings.
Frequently asked questions
Do I need to finish the border arc at Greysand Pass before Righteous Verdict appears?
Yes. The quest marker for Righteous Verdict is tied to the resolution of the border arc at Greysand Pass, including the side objective to recover the merchant ledger from the ruined watchtower. If the arc is still active, the marker does not appear even if the player has spoken to the judge NPC, and the cleanest fix is to backtrack to Stoneford and complete the missing objective before returning.
Can I switch factions after I pick one in the quest?
Yes, but only through a follow-up quest called A Second Hearing, which becomes available at the arena after the player has spent a small amount of reputation with the chosen faction. The reversal costs reputation, so most players prefer to read the related journal entry and pick the faction they want to keep for the rest of the play session.
What is the difference between witness rules and ordeal rules?
Witness rules allow healing items, spirit summons, and mounted combat, and they are the default for a first visit. Ordeal rules restrict the player to melee weapons, a single ranged sidearm, and no consumables, and they are signalled by the Red Thorn banner over the northern tunnel. The encounter is harder under ordeal rules, but the reward tier is the same.
Why did the two elite guards feel slower when I fought them together?
The two elite guards share a damage aura while both are alive, which cuts the player’s stamina regeneration and slows the swing speed of heavier weapons. The aura drops as soon as the first elite guard falls, and the second guard can then be finished with the same combo used on the standard soldiers.
Does my ultimate ability work on the named opponent from the start of the fight?
No. The named opponent is immune to stagger during the first 60 percent of the encounter, and the game plays a distinct audio cue when the immunity ends. Using the ultimate ability before the cue does not deal real damage and puts the ability on cooldown, so it is worth waiting for the audio cue before committing.
Is Righteous Verdict replayable for the named weapons?
Yes. The encounter is short, self-contained, and replayable, and the named weapon drops come from a small loot pool. The exact weapon is not guaranteed across runs, but a focused player can clear the encounter on a tight loop, and the arena rank system tracks the player’s best time across attempts.
How does Righteous Verdict affect Kliff’s affinity?
The faction choice has a small effect on Kliff’s affinity. Picking Black Lion is neutral, with a small positive bonus if the player has read the related journal entry. Picking Red Thorn is negative if the player chooses it without reading the journal entry first, so it is worth reading the entry before the dialogue opens.
Where does Righteous Verdict sit in the Crimson Desert campaign?
Righteous Verdict sits in the middle of the campaign, after the player has traveled across Pailune and into the contested border region around Hernand. It is one of three named arena quests in the Hernand region, and it is the recommended first stop because it teaches the arena’s banner rules and pacing.
Can I clear Righteous Verdict on the first attempt with a fresh character?
It is possible but not guaranteed, because the encounter scales with the player’s current gear score and the first run usually includes one or two of the common failure modes. A second attempt with the banner rules and the stagger immunity in mind is usually enough to clear the encounter, and the repeatable nature of the arena makes the second attempt low cost.
What is the cleanest order to clear the three Hernand arena quests?
The cleanest order for a first-time player is Righteous Verdict, then The Long Counting, then The Burned Ledger, because that order matches the difficulty curve and the player’s familiarity with the arena’s rules. Skipping straight to The Burned Ledger is possible, but the stealth section is harder to read on a first visit because the player has not yet seen the arena’s patrol patterns from the combat side.
Leave a Reply