
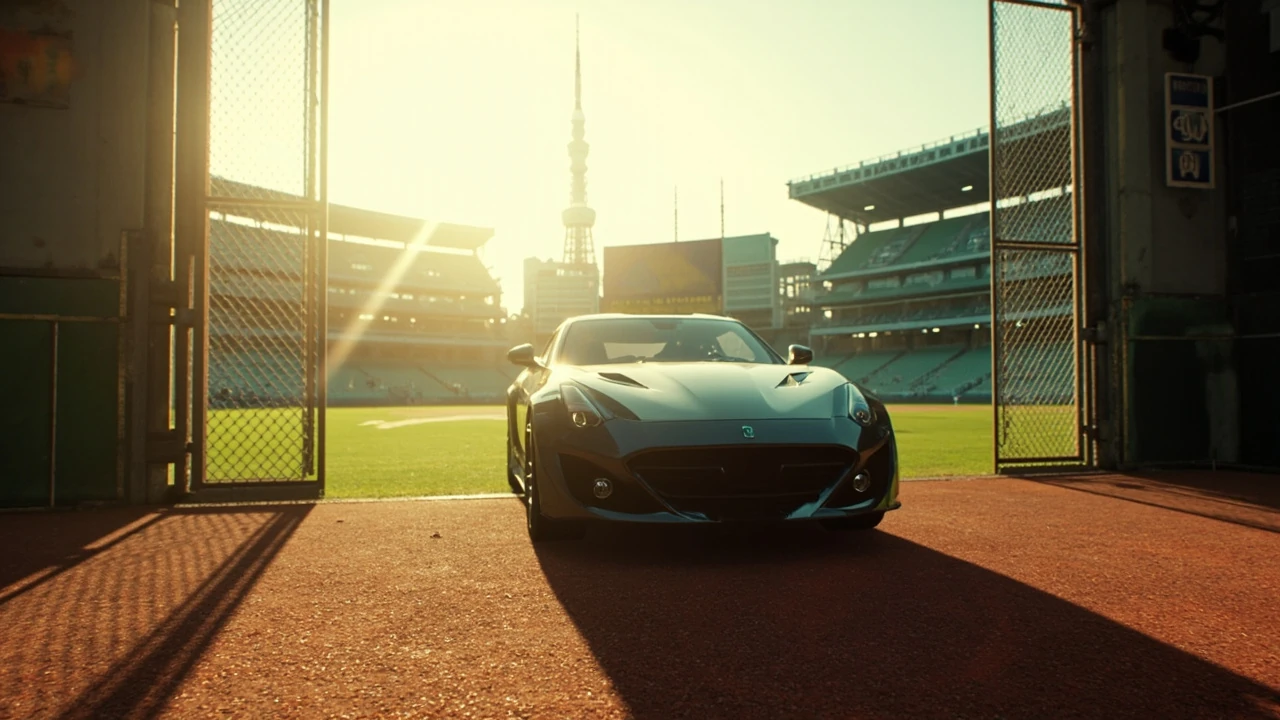
Edogawa Baseball Stadium FH6: where the Pitcher Perfect photo challenge begins
Seasonal Festival Playlists in Forza Horizon 6 rotate photo challenges across Tokyo City, and the Edogawa Baseball Stadium FH6 stop is the kind of task that punishes players who rely on the minimap alone. The in-game prompt shows a sliver of green outfield and a high chain-link fence, then asks the driver to step into the frame at the correct corner of the pitch. Players who have already chased the Tokyo Tower photo challenge in the same season usually find this task a few blocks away, but the stadium itself is not pinned to the world map, which makes the search heavier than the actual drive.
This guide is built for drivers who want the shortest reliable path to Edogawa Baseball Stadium, the right corner of the field to drive into, and the Festival Playlist reward for completing the challenge. It also covers the car selection, camera angles, and common mistakes that lead to a failed photo, because the difference between a cleared activity and a wasted ten minutes usually comes down to the approach lane and the moment the shutter fires.
Before driving across the map, take a moment to check three things: the current active season in the Festival Playlist, the Playlist tab inside the pause menu, and whether the photo challenge tracker still shows the baseball field silhouette. A playlist that has just rolled over can swap challenges at the same coordinates, and a cleared challenge no longer rewards points, so the same drive can become a scenic detour instead of progress.
Where Edogawa Baseball Stadium sits in Tokyo City
Edogawa Baseball Stadium is a large grassy square in the northwest of Tokyo City, positioned a few blocks north of the Tokyo Tower landmark and west of the Highway Circuit road race route. From the air, the field reads as a wide green rectangle enclosed by tall fencing, with a hard dirt infield and a single large doorway on the northeast side. The stadium is not marked with its own icon, so the search is essentially a visual one guided by three surrounding landmarks: Tokyo Tower to the south, the Highway Circuit start area to the east, and the food delivery job hub that recurs through the same season of activities.
Drivers approaching from the central highway can leave at the interchange nearest the Tokyo Tower fast-travel point, then drift north across two or three city blocks. The food delivery job landmark is a useful intermediate waypoint because the streets between the tower and the stadium share the same low-speed cornering style, and the same alleyways that handle delivery traffic also lead into the field. The Highway Circuit start zone to the east acts as a hard eastern boundary; once a driver sees the paved ribbon of the circuit and the painted start gantry, they have driven too far and need to swing back west.
For players who prefer route planning over visual searching, the following table summarises the landmarks that bracket the field and the direction each one implies for the final approach.
| Landmark | Position relative to the stadium | What it tells the driver |
|---|---|---|
| Tokyo Tower | South, a few blocks away | Head north from the tower, away from the bay |
| Highway Circuit start area | East, bordering the city block | If the circuit ribbon appears, turn west |
| Food delivery job hub | Southeast, near the tower | Use the delivery streets as a navigation backbone |
| Bay shoreline | Far south, behind the tower | Stay inland; do not drive toward the water |
| Northern suburban blocks | North, across a single arterial road | Approach from the wider streets if the southern alleys are blocked |
The combination of a familiar southern landmark and a clear eastern barrier means most drivers locate Edogawa Baseball Stadium in a single pass. Players who fast-travel directly to Tokyo Tower save roughly half a minute of highway driving, but they still need to traverse the city block, because no direct fast-travel point exists for the field itself. The same logic holds for drivers who arrive from a drift zone event in the northern suburbs: the field sits south of the arterial road, and the doorway opens onto the same grass square regardless of which side the driver approaches from.
Local traffic patterns around the stadium are worth a brief note. The streets between Tokyo Tower and the field handle most of the food delivery traffic for that part of the map, so they are usually populated by slower AI vehicles that stop unexpectedly at junctions. A driver who treats these streets as a navigation backbone needs to plan for short bursts of acceleration between intersections rather than a continuous cruise, and that rhythm matches the doorway approach more closely than a highway-style arrival would.
Reading the in-game photo prompt before driving
The challenge description is intentionally vague. It mentions a baseball field, gives no compass direction, and offers only a faint visual hint that players who already know Japanese baseball culture may recognise as Edogawa. Drivers who try to match the prompt pixel-for-pixel often end up parked at the wrong corner of the field, which is the most common reason the photo fails on the first attempt. The wording also omits the word “inside”, which is what trips up drivers who read the prompt as a request to photograph the stadium from the street.
The most reliable way to interpret the prompt is to split it into three visual cues and check each one against the surroundings as the car approaches:
- The high fence railings that enclose the outfield, visible from the street.
- The large doorway that opens onto the pitch, framed by a concrete lintel.
- The northeast corner of the field, where the prompt frames the doorway in profile.
When all three cues line up at once, the car is at the correct corner and the photo can be taken. The doorway is the strongest cue because it is the only large opening in the fence; the railings repeat around the entire stadium, and the corner alone is ambiguous without the doorway as a reference point. Drivers who arrive during the late afternoon will also see the doorway casting a long shadow onto the infield, which is an additional cue that the prompt does not describe but is useful in practice.
One more cue worth mentioning is the sound design. The stadium interior carries a subtle echo that becomes audible once the car is past the fence line, and the audio mix is a quieter version of the same cue that signals entry into a drift zone. Drivers who play with the game volume turned up can use that echo as a confirmation that the shutter will count, even before the on-screen tracker updates.
Driving into the stadium for the photo
Once the northeast corner is identified, the driver needs to roll the car through the doorway and onto the outfield grass. The pitch is treated as a drivable surface in this section of the map, and the stadium has a wide enough entrance to allow most car classes to enter without scraping. The actual shutter moment is the part that trips up drivers who park too neatly or who stop in the wrong position once they are inside, and the difference between a clean accept and a failed attempt often comes down to how the car is angled when the wheels touch the grass.
Forza Horizon’s photo mode uses the car as the framing anchor, so the position of the car relative to the doorway and the outfield grass is what determines whether the photo is accepted. A clean approach looks like this:
- Spawn or stop on the street just outside the northeast doorway, with the front of the car pointed at the opening.
- Drive forward at low speed, around twenty to thirty kilometres per hour, until the front wheels are on the grass.
- Hold the line so the doorway sits in the background of the framing, with a clear view of the pitch and the far fence.
- Open photo mode, leave the default camera roughly at driver height, and capture the frame.
The PC Gamer walkthrough of the same challenge points out that the shutter needs to fire while the car is actually inside the stadium, not at the entrance. The doorway alone is not enough, because the challenge system checks that the vehicle is past the fence line, which is why the slow rolling approach matters more than a precise park. Drivers who try to stop exactly on the doorway threshold usually find that the photo does not register, because the rear wheels are still on the paved apron outside the fence.
A secondary tip is to avoid braking hard once the wheels touch the grass. The outfield surface has a slightly different friction profile from the surrounding street, and a heavy brake can unsettle the car enough to drag the rear bumper against the concrete lintel of the doorway. A gentle hold on the throttle is enough to keep the car straight while the shutter fires, and it leaves the car in a position that is easy to drive back out once the challenge is cleared.
Choosing the right car for the drive
The pitch is a forgiving surface, but the streets around Edogawa Baseball Stadium are the kind of narrow, low-speed corners that punish cars with poor turn-in and harsh suspension. Drivers who plan to fast-travel to Tokyo Tower first and then drive across the city block should pick a car that handles tight corners without sacrificing the camera framing inside the field. The terrain between the tower and the stadium is mostly flat, so ride height is less of a concern than steering lock and overall length.
Three car classes tend to work well for this challenge, and the table below summarises how each class behaves on the approach.
| Car class | Strength on the approach | Weakness to watch for |
|---|---|---|
| Compact hot hatch | Short wheelbase, tight turning, easy camera framing | Lower top speed if the driver misses the doorway and needs to circle |
| Mid-engine sports car | Balanced handling, stable at low speed, clean sight lines | Longer body can clip the doorway frame if the approach is angled |
| Modern JDM coupe | Themed fit for Tokyo City, neutral handling, predictable braking | Stiffer suspension transmits kerb hits that can shake photo mode |
| Retro kei-style roadster | Narrow body, very tight lock, light kerb weight | Soft chassis can flex over the doorway lip if the approach is fast |
A compact hatchback is the safest default because it can pivot on a single street if the driver overshoots the doorway. A mid-engine sports car gives a cleaner photo composition but demands a straighter approach, and a modern JDM coupe is the thematic pick for players who want the visual match to the stadium. A retro roadster is a niche option for drivers who value the tight turning circle over outright stability, and it is most useful when the food delivery job hub is congested with traffic. The challenge itself accepts any car, so this is a comfort decision rather than a mechanical one.
How the Festival Playlist rewards fit together
Photo challenges are a low-effort way to bank Festival Playlist points during a season, and Edogawa Baseball Stadium FH6 is one of three points the driver can earn from a single activity. The same PC Gamer source confirms the photo challenge awards three points, which is a meaningful chunk of the weekly total and feeds directly into the Winter season reward track. For drivers who are juggling several activities in a single session, three points from one short drive is a reasonable return on time invested.
The Winter season reward track is the layer most drivers care about, because it gates cars and cosmetic items that do not return outside the active season. Two of the headline rewards tied to the same season are the 2019 Subaru STI S209 and the 2016 Toyota Land Cruiser Arctic Trucks AT37, both of which require a point total that photo challenges contribute to. A second, smaller reward is the Slide Whistle car horn, which is a cosmetic pickup for drivers who enjoy collecting oddities.
The seasonal reward structure creates a small incentive to clear the photo challenge on the first attempt rather than the third, because each failed attempt still costs the same drive but adds no points. Drivers who treat photo challenges as a checklist rather than a scenic detour tend to be more efficient with their season budget, and the Edogawa Baseball Stadium FH6 stop is a good candidate for that approach because the route is short once the doorway is identified.
It is also worth noting that the same three-point award is typical for photo challenges across the Festival Playlist, so the Edogawa stop is not an outlier in either direction. The reward ceiling for a single photo challenge is fixed by the playlist design rather than by the difficulty of the location, which means players who want a higher return per drive should pair the photo challenge with a nearby drift zone or speed trap that also feeds the same season total.
Common reasons the photo fails
Most failed attempts at Edogawa Baseball Stadium FH6 fall into a small handful of patterns. Recognising them ahead of time is faster than retrying the challenge blind, and the patterns are stable across seasons because they are tied to the geometry of the field rather than the playlist itself. Drivers who learn to read the failure patterns usually clear the challenge on the second attempt at worst, and often on the first.
- Stopping on the street outside the doorway instead of driving onto the grass. The challenge system checks that the car is inside the stadium.
- Driving to the wrong corner of the field. The northeast corner is the one framed by the prompt; the southwest corner has a similar fence but no doorway.
- Triggering photo mode before the car has cleared the fence line. The doorway is the background cue, but the wheels need to be on the pitch.
- Approaching at high speed and clipping the doorway frame, which can push the car back onto the street and reset the position.
- Attempting the challenge after the Festival Playlist has rolled over to a new week, when the same coordinates no longer host the photo challenge.
- Driving a car with a very long wheelbase and catching the rear bumper on the doorway lintel, which can pop the car back onto the street.
The first three are by far the most common, and they are all fixed by slowing down and reading the doorway before opening photo mode. The last two are timing and equipment issues that affect every photo challenge in the game, not just this one, and they tend to surface when a driver returns to a previous season’s activity after several weeks away or switches to a larger car class without adjusting the approach.
Approach routes from the main map icons
Players who prefer to plan a route before driving will want a clear mental map of which highway exit to take and which surface streets to use. The field is reachable from four directions, and each direction has a different feel: from the south, the route threads through the food delivery job streets; from the east, the route skirts the Highway Circuit; from the north, the route drops through suburban blocks; from the west, the route crosses the closest fast-travel road.
Three reliable approach routes are worth memorising, and each one suits a slightly different driving style.
- From Tokyo Tower fast-travel: head north, cross the food delivery job hub, and continue two blocks past the final alley. This is the most direct route and the one used by the PC Gamer walkthrough.
- From the Highway Circuit start: swing west at the first painted gantry, then take the first left after the circuit barrier. This is the cleanest route for drivers who are already near the circuit for a road race event.
- From the northern suburbs: drop south along the main avenue, then turn east at the row of mid-rise apartments. This is the smoothest route for drivers who prefer wider streets and gentler corners.
All three routes converge on the same northeast doorway, so the choice is mostly about which landmark the driver is closest to when the challenge activates. Drivers who keep a mental note of these three entry points tend to clear photo challenges in a single attempt, because they do not have to rethink the route every time the playlist rotates. The western approach is occasionally useful for drivers coming from a different fast-travel point, but it adds an extra block of residential streets and is best treated as a fallback rather than a primary route.
Camera and framing tips inside photo mode
Forza Horizon’s photo mode is generous, and the Edogawa Baseball Stadium FH6 challenge does not require a cinematic composition to clear. The system checks the position of the car relative to the field, not the artistic quality of the frame, which means drivers who spend too long tweaking the camera can lose time without changing the outcome. A short, deliberate setup is more efficient than a long, experimental one, and most players settle on a default setup after a single attempt.
Three framing defaults are reliable across car classes and time of day:
- Default camera height, with a slight rear-quarter angle, so the doorway sits behind the car.
- Mid-day or early afternoon lighting, which keeps the outfield grass readable and avoids the long shadows of dusk.
- A neutral shutter speed, so the rolling car does not introduce motion blur at the moment of capture.
Players who want a more deliberate composition can lower the camera and angle it toward the doorway, which puts the pitch and the far fence into the same frame. The challenge still completes with this composition, and the resulting screenshot is more useful for sharing or for personal gallery collections. A wider lens also helps if the car is a longer-wheelbase model, because the doorway fits into the frame without the rear bumper dominating the shot.
For drivers who care about screenshot quality rather than pure efficiency, the best time of day for the photo is the first hour after the in-game sun reaches its peak. The grass reads as a saturated green, the doorway casts a short shadow that frames the car cleanly, and the fence in the background is well lit without blowing out. Dusk and night still work for the challenge itself, but the screenshot tends to lose the texture of the outfield and the chain-link pattern on the fence.
How this challenge compares with the Tokyo Tower photo challenge
The Tokyo Tower photo challenge runs in the same Festival Playlist week, which is why drivers often clear the two in a single session. The two challenges share a southern Tokyo City base, but they differ in several ways that matter for planning. The following table sets out the practical differences.
| Aspect | Tokyo Tower photo challenge | Edogawa Baseball Stadium FH6 |
|---|---|---|
| Map icon | Yes, marked as a fast-travel point | No, unmarked grassy square |
| Primary cue | The tower itself, visible from a wide radius | The doorway on the northeast corner |
| Surface type at the photo point | Paved plaza around the tower base | Grass outfield inside the stadium |
| Typical approach | Drive into the plaza and stop near the base | Drive through the doorway and onto the grass |
| Failure mode | Parking on the wrong side of the tower | Stopping on the street instead of the pitch |
| Best car class | Any class, since the plaza is large and open | Compact hatch or short-wheelbase coupe |
The tower challenge is easier to find, but the stadium challenge is easier to clear once the doorway is identified, because the framing is more forgiving and the doorway acts as a single visual anchor. Drivers who clear both in one session usually start with the tower, then drift north to the stadium while the camera is still set up. The two challenges together contribute a meaningful slice of the weekly Festival Playlist total, and chaining them is one of the more efficient point-grind loops available in the early weeks of a season.
What to do after the photo is accepted
Once the photo is accepted, the Festival Playlist tracker updates within a few seconds and the three points land in the season total. The car can be driven straight back out through the same doorway, because the stadium is treated as open terrain rather than a closed event space, and the surrounding streets connect directly to the food delivery job hub. Most drivers use the return drive to reposition for the next activity in the playlist, because the same area usually hosts at least one drift zone, a speed trap, or a trailblazer event.
The slide whistle car horn is a small reward that does not change driving performance, so drivers who do not care about cosmetic collections can ignore it without losing progress. The two headline cars, the 2019 Subaru STI S209 and the 2016 Toyota Land Cruiser Arctic Trucks AT37, are the real prize, and they remain locked behind the Winter season reward track regardless of how quickly the photo is cleared. Once the season rotates, the same cars move into a different bracket and are no longer available through the same point total.
Players who want to push their season total further can use the same drive to clear the food delivery job in the same city block, which contributes its own points and keeps the car warm for the next event. The Festival Playlist is designed so that the same area hosts several activities in a single week, and chaining them is the most efficient way to bank points. A short loop that covers the stadium photo, the delivery job, and a nearby speed trap typically clears in under ten minutes, which is a useful benchmark for drivers who want to plan a session around a specific reward target.
Season timing and rotation behaviour
The Edogawa Baseball Stadium FH6 photo challenge is a Winter season activity, which means it is only available during the active Winter rotation. The Festival Playlist rotates weekly, and the same coordinates usually host a different photo challenge once Winter ends. Drivers who try the same spot during Spring, Summer, or Autumn will find a working stadium but no photo challenge tracker, which is the most common reason a returning player thinks the activity has been removed.
The challenge is also tied to Series 1 of the live service cycle, which is why it shares the season with the Tokyo Tower photo challenge and several other Tokyo City landmarks. Players who started the game after Series 1 ended will not see this challenge in their current playlist, and the same coordinates will not unlock it retroactively. The honest expectation is that the challenge returns only when the live service cycle revisits Series 1 or a similar Winter season in the future, and there is no in-game way to fast-track that rotation.
Drivers who want to verify the current status of the challenge should open the Festival Playlist tab in the pause menu and look for the baseball field silhouette in the active photo challenge slot. If the slot shows a different landmark, the season has rotated and the same drive will not award points, even if the stadium is still drivable. The same check applies to the Tokyo Tower photo challenge, which is a useful cross-reference: if the tower challenge is also missing from the active playlist, the entire week has rotated and there is no point in driving to either location for points.
Frequently asked questions
Where exactly is Edogawa Baseball Stadium in Forza Horizon 6?
Edogawa Baseball Stadium is in the northwest of Tokyo City, a few blocks north of the Tokyo Tower landmark and west of the Highway Circuit road race. The stadium is a large grassy square enclosed by high chain-link fencing, with a single large doorway on the northeast side. It is not marked on the world map, so the search relies on the surrounding landmarks rather than a fast-travel point.
Do I need a specific car to clear the Pitcher Perfect photo challenge?
No. The challenge accepts any car class, because the system checks the position of the car relative to the field rather than the specifications of the vehicle. A compact hatchback is the easiest to manoeuvre into the doorway, but a mid-engine sports car or a modern JDM coupe also works. The choice is about comfort and camera framing rather than mechanical requirements.
Why does my photo keep failing at the stadium?
The most common reason is that the car is still on the street outside the doorway when the shutter fires. The challenge system checks that the car is inside the stadium, past the fence line and on the grass. A slow rolling approach through the doorway, with the front wheels on the outfield, is the safest way to satisfy that check.
How many Festival Playlist points does the photo challenge award?
The Edogawa Baseball Stadium FH6 photo challenge awards three Festival Playlist points on completion, according to the PC Gamer walkthrough of the same activity. Those points feed into the Winter season reward track, which gates cars such as the 2019 Subaru STI S209 and the 2016 Toyota Land Cruiser Arctic Trucks AT37.
Is the stadium marked on the world map?
No. The stadium is a drivable open-world location but does not have its own map icon, fast-travel point, or activity marker. Drivers locate it by combining the Tokyo Tower landmark to the south and the Highway Circuit start area to the east, which together bracket the field within a single city block.
Can I clear the challenge at any time of day?
Yes. The challenge is available throughout the active Winter season, day or night, and the lighting does not affect the outcome. Mid-day or early afternoon lighting gives the cleanest framing, but dusk and night also work as long as the car is past the doorway and on the grass when the shutter fires.
Does the challenge return in later seasons?
The Edogawa Baseball Stadium FH6 photo challenge is tied to Series 1 of the live service cycle and the Winter season rotation. It returns only when the live service cycle revisits a similar Winter playlist. Outside that window, the stadium is still drivable, but the photo challenge tracker does not activate at the same coordinates.
What rewards are tied to the Winter season track?
The Winter season reward track includes the 2019 Subaru STI S209 and the 2016 Toyota Land Cruiser Arctic Trucks AT37 as headline cars, plus the Slide Whistle car horn as a smaller cosmetic pickup. Photo challenges, drift zones, speed traps, and trailblazer events all contribute points to the same season total, and clearing the Edogawa photo challenge adds three points to that total.
Can I chain the stadium challenge with other nearby activities?
Yes. The same city block usually hosts a food delivery job, a drift zone, and a trailblazer event during the same Festival Playlist week. Drivers who chain those activities in a single loop tend to clear the playlist faster, because the drives between events overlap and the same car setup works for all of them.
What happens if I try the challenge after the playlist rotates?
The stadium remains drivable, but the photo challenge tracker no longer activates at the coordinates, and the activity does not award Festival Playlist points. The same drive becomes a scenic detour rather than progress, and the only way to earn the points is to wait for the Winter rotation that hosts the same challenge to return.
Leave a Reply