
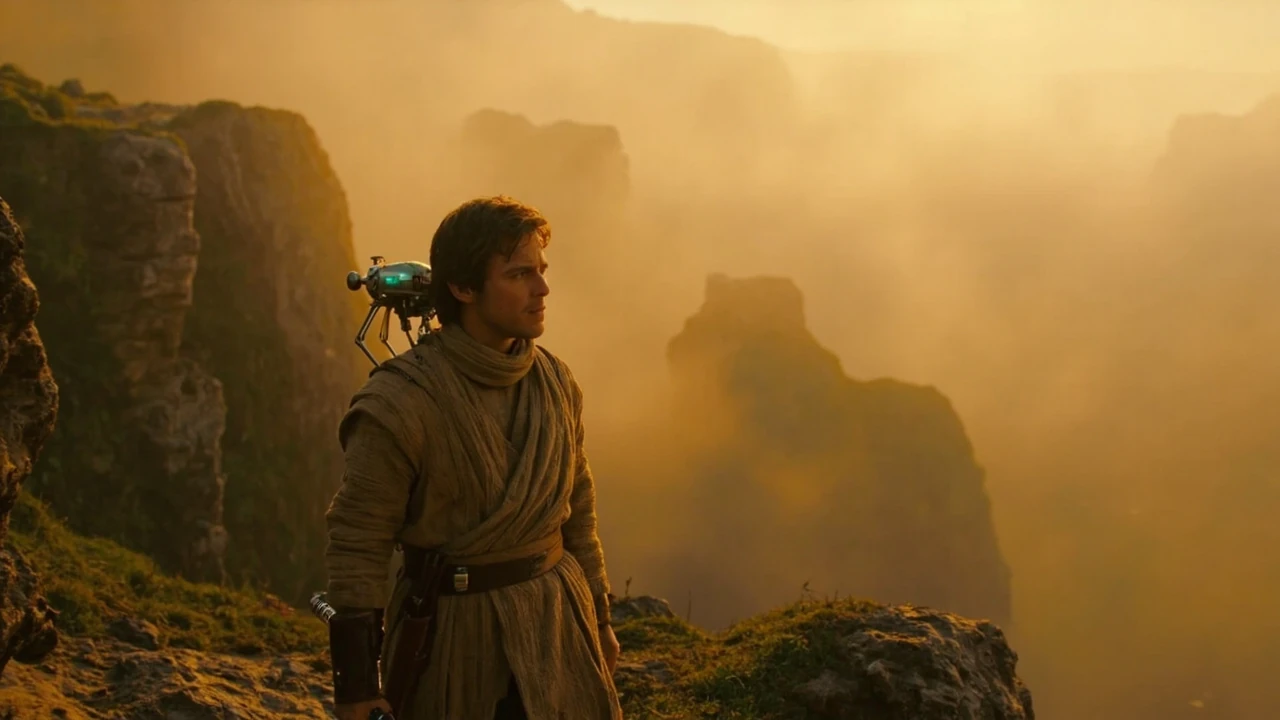
Jedi fallen order walkthrough: a practical route through Cal Kestis’s campaign
A reliable jedi fallen order walkthrough is less about memorizing every corridor and more about understanding how the campaign expects you to move. The game is built on a metroidvania structure, which means that early areas quietly block progress behind abilities you have not earned yet. The published guide for the game describes it as a single-player action adventure where the player takes the role of former Padawan Cal Kestis, traveling with friendly companions and a small droid endowed with unique abilities, and the structure is consistent with that description across every planet you visit.
For a player who wants to finish the story without bouncing between video timestamps, the most useful approach is to treat the walkthrough as three layers: the order of the main story chapters, the boss fights that gate those chapters, and the exploration rules that determine what you can return for later. Once those three layers are clear, almost every obstacle in the game stops feeling like a dead end.
How the main campaign is organized
The campaign is delivered as a sequence of named planets rather than a continuous open world. The verified guide notes that you can travel between different planets on the galaxy map, focus only on the main plot when you want, or return to previously visited planets for additional exploration. The implication is that progression is not strictly linear in real time, but it is strictly linear in story terms. The game opens with a prologue, introduces Bogano as the first real exploration space, then routes you through Zeffo, Kashyyyk, Dathomir, and finally back into the endgame zones that close Cal’s arc.
If you are using a walkthrough, treat the planets as chapters with their own internal loops rather than as a single line. Each planet usually has a critical path that pushes the story forward, a set of locked doors or ledges that require abilities you have only just unlocked, and a handful of optional tombs or vaults that reward careful exploration. Skipping the critical path slows you down. Skipping the optional layer makes the mid-game feel barren. The walkthrough is most useful when it tells you which doors you cannot open yet and why, so you can mark them and return after the next story beat.
What a chapter typically contains
- A critical path that includes one or two named bosses and a small cluster of cutscenes that move Cal’s relationship with Cere, Greez, and the Mantis crew forward.
- A meditation circle placed at a chokepoint, which doubles as a checkpoint, a heal point, and the place where you spend earned skill points.
- At least one optional area that is reachable now but easier to clear once a new Force ability is unlocked, which the walkthrough will usually flag as “return later.”
- A handful of lore items, chests, and occasionally a Jedi Temple or a Zeffo tomb that asks you to solve a small environmental puzzle.
Core combat and traversal rules before you follow a walkthrough
Most of the “stuck” moments players report in a jedi fallen order walkthrough are not puzzle failures. They come from misunderstanding how the basic loop works. The combat system is stamina-aware, the lightsaber has a single durable form, and the Force meter is shared between offense, defense, and slow.
Before following any specific route, it helps to internalize four rules that apply almost everywhere in the game:
- Enemies respawn when you meditate, similar to games in the Dark Souls family. The guide explicitly notes that ordinary opponents revive after you rest at a meditation point, and that defeated bosses do not respawn.
- The game is single-player only. The same source confirms there is no multiplayer, online or local, and no cooperative mode. Cal is accompanied by BD-1, but the droid is automatically activated and not directly controlled.
- Healing is finite until you progress. BD-1 can stim Cal during or after combat, but the supply is limited. Walking into every fight at full health is not the default state.
- Climbing is not fully automatic. The guide points out that when you find an interactive wall you must press a dedicated button to grab the climbable element. Skip that input and you can fall back to the ground or, in the worst case, into an abyss.
These four rules explain roughly two thirds of the frustration that walkthrough readers describe. Once they are second nature, the boss strategies in the rest of this guide make more sense.
Prologue and the first taste of the Second Sister
The prologue exists to teach the basics and to deliver a fight you are not meant to win. The guide’s account of the encounter is direct: the first confrontation with the Second Sister happens in the final part of the prologue, and Cal cannot defeat her because doing so is part of the plot. The fight ends automatically either when Cal’s health is depleted or when the scripted timer runs out, and a cutscene carries him off the planet in a spaceship.
This is the one fight in the game where “losing is winning.” Do not waste stimpacks on her, do not hunt for parry windows you have not unlocked yet, and do not read the cutscene as a hint that you missed a trick. The walkthrough exists to confirm that this encounter is on rails so you can stop second-guessing it.
Checklist for the prologue
- Reach the clifftop where Cere points out the target.
- Engage the Second Sister, expect the fight to end on its own.
- Watch the escape cutscene without trying to re-engage after the ship is boarded.
Bogano: the first metroidvania gate
Bogano introduces the holomap, the first real exploration, and one of the most common soft locks in the game. The guide describes a specific issue: when you first try to open the holomap on Bogano, the game can show a message that BD-1 is busy. The recommended fix is to follow the main story forward until you reach the cutscene that fixes BD-1, after which the droid jumps on Cal’s back and the holomap, plus healing requests, work normally.
If your walkthrough ever tells you to “check the map” and the prompt refuses to open, that is the reason. Push the story, not the exploration layer, until BD-1 is patched in.
Bogano also introduces the Zeffo temple, vertical climbing, and the first real Force echo sequences. Expect a short, quiet chapter with a low number of combat encounters and a high number of platforming sections. The walkthrough is most useful here as a checklist of which ledges are accessible now and which require the wall-run or force-push abilities you have not yet learned.
Bogano at a glance
| Element | What to expect | Walkthrough note |
|---|---|---|
| Holomap | Locked until BD-1 is fixed | Follow the story forward if the map will not open |
| Climbing sections | Vertical ropes, vines, and ledges | Press the dedicated climb button at every wall to avoid falls |
| Force echoes | Short memory sequences | Read the echoes for lore; they do not block progression |
| Critical boss | None on the first visit | This chapter is about platforming and exploration |
Zeffo: the boss-heavy middle of the game
Zeffo is where the walkthrough earns its keep. The published guide lists Zeffo as the home of several named encounters, including the Second Sister fight on this planet, Crusher Hagop, the arena battle variant of Crusher Hagop, and the Rabid Jotaz. Each of those has a specific approach, and most of them punish reckless stamina use.
The general pattern on Zeffo is to enter a vault, clear the trash mobs first, then push the named boss. The trash mobs exist to drain your stimpacks and Force meter, so the walkthrough’s job is to tell you when to clear the room, when to skip the room, and when to rest at a meditation circle between two adjacent fights. The Rabid Jotaz in particular rewards patience: the creature telegraphs its lunges, and the safe windows are wider than they feel during the first attempt.
Order of operations on Zeffo
- Land on the surface and locate the first meditation circle as your anchor for the chapter.
- Clear the Imperial scout groups in the entry path without burning stimpacks you will need for the first boss.
- Reach the ice vault, solve the central puzzle, then prepare for the Second Sister rematch.
- Progress to the tomb of an ancient Zeffo sage and face Crusher Hagop, returning to the arena area afterwards for the optional repeat battle if you want the related reward.
- Push the critical path until the Mantis leaves the planet.
How the Zeffo boss list stacks up
| Boss | Style | Primary risk | Walkthrough priority |
|---|---|---|---|
| Second Sister (Zeffo) | Aggressive duelist | Parry timing under pressure | High: gate the next chapter |
| Rabid Jotaz | Lunging beast | Stamina drain between windows | High: only path through a vault |
| Crusher Hagop | Heavy bruiser | One-shot grab if caught | High: story-critical fight |
| Crusher Hagop (arena) | Same enemy, longer fight | Wound-up area attacks | Medium: optional reward |
Kashyyyk: open space, tight windows, and the Albino Wyyyschokk
Kashyyyk feels different from Zeffo because the canopy is wider and the Imperial presence is heavier. The walkthrough’s role here is to mark the order of the climb up the Origin Tree, the timing of the security droid encounter, and the route to the Albino Wyyyschokk. The guide lists both the Security Droid and the Albino Wyyyschokk as named encounters on this planet, which is a useful signal that the chapter is built around vertical combat rather than dense arena fights.
The Albino Wyyyschokk is one of the more unusual encounters in the game because it is a reskin of a basic enemy class with a much wider moveset. The walkthrough’s job is to remind you that the same parry rules apply, but the timing windows are wider, and the safest counter-attack is the slow followed by two heavy strikes. The Security Droid, in contrast, is a more mechanical fight where interrupting its leap is the cleanest path to victory.
Walking the Kashyyyk chapter
- Locate the meditation circle as soon as you can. The chapter is long, and a clean anchor saves you from backtracking through empty canopy.
- Deal with the Security Droid in the occupied village before pushing toward the upper Origin Tree sections.
- Approach the Albino Wyyyschokk with full stimpacks and at least one saved Force charge. The fight punishes players who arrive drained.
- Treat the wookiee rescue subplot as part of the critical path on the first visit. Optional content on Kashyyyk is sparse compared to Bogano and Zeffo.
Dathomir: the high-risk detour
Dathomir is the chapter that breaks the assumption that you must clear every planet. The walkthrough for the game lists the Nydak Alpha as a named boss on Dathomir, and the planet is otherwise framed as dangerous, lightly populated, and full of tombs. The game still allows you to leave and return, but the design pressure is clear: Dathomir is for players who want sturdier challenges, not for first-time visitors who need a safe route.
If you follow a jedi fallen order walkthrough in order, Dathomir is usually the optional detour that pays for itself in skill points, mantis paint jobs, and a tougher boss set. If you skip it, the story still works, but you will be under-leveled for the endgame.
Dathomir visit priorities
- Land near the first meditation circle, then scout the Nightbrother village before committing to deeper tombs.
- Approach the Nydak Alpha fight with a full bar of stimpacks. The encounter rewards patience and a slow first phase.
- Return to the Mantis between tombs if the chapter drags on. There is no penalty for leaving, and respawned trash mobs will be easier to clear on a second pass.
Endgame planets and the final boss cycle
The endgame returns to a smaller, sharper set of locations and closes the campaign against the Ninth Sister, Gorgara, and Taron Malicos. The published guide names all three as encounter highlights, and the implication is that the late game cycles through different combat styles: a duel against a lightsaber antagonist, a beast fight with environmental hazards, and a former Jedi with corrupted powers.
The walkthrough’s job in the endgame is to make sure you do not walk into Gorgara or Taron Malicos with an empty skill tree. Spend your points before the final descent. The game does not lock you out of meditation, but the opportunities to respec are rare once the credits begin to roll.
Endgame boss priorities
| Boss | Style | Walkthrough note |
|---|---|---|
| Ninth Sister | Heavy duelist with crowd control | Keep distance, force slow, punish her recovery animations |
| Gorgara | Winged predator with aerial phase | Force slow at the start of every swoop, then commit to two saber strikes |
| Taron Malicos | Fallen Jedi with dark side Force powers | Save stims for the second phase, when the arena shrinks and the adds appear |
Exploration layer: what to chase and what to leave
The walkthrough’s secondary value is in the exploration layer. The published guide describes a metroidvania structure where many places are initially unavailable until you progress in the story and acquire new abilities. A practical rule of thumb is to mark three kinds of objects on the holomap and ignore the rest.
- Doors and ledges that visibly need a Force power you have not learned yet. Mark them, return later.
- Zeffo tombs and Jedi temples. These are puzzles, not fights, and they reward slow reading of the holomap.
- Chests in optional rooms. These can contain cosmetics, lightsaber parts, and skill points, and they are usually the fastest way to break the difficulty curve in your favor.
Cosmetic items, including outfits, skins, and Stinger Mantis paint jobs, are earned by exploring the locations and opening loot chests or by advancing the main storyline, according to the guide. There is no microtransaction layer in the game, and there are no boosters or loot boxes. That is a useful fact to keep in mind when you see a cosmetic you like: the path to it is in the world, not in a storefront.
Death, respawn, and how to manage stamina
Death in the game is not punitive. The walkthrough should treat it as a checkpoint mechanic rather than as a failure state. Meditation respawns ordinary opponents, not bosses, so a death followed by a rest puts you back into a clean arena, but the trash mobs that surround the boss will be there again. The game does, however, keep your earned experience and skill points, so the cost of a death is the time spent re-clearing the room.
Stamina management is the other key skill. The lightsaber swings, the dodge, the Force slow, and the parry all share resources. Walking into a fight with all four systems on cooldown is the most common cause of a chain of deaths. The walkthrough’s job is to point out meditation circles before tough rooms, so you can plan the next attempt from a clean state.
Common death causes and quick fixes
| Symptom | Likely cause | Walkthrough fix |
|---|---|---|
| Cal dies in one hit from a heavy enemy | Stamina was empty before the swing | Rest at the meditation circle, enter the fight at full resources |
| Cal falls into an abyss during climbing | Climb input was not pressed at the wall | Look for the climb prompt on every vertical surface before stepping off the ledge |
| Trash mobs respawn mid-chapter | Meditation was used at a checkpoint | Treat the respawn as a reset, not a punishment, and plan the next attempt |
| Boss fight feels unfair on the first attempt | Under-leveled for the chapter | Backtrack to a previous planet, clear optional tombs, and return with more skill points |
Settings, accessibility, and the small things a walkthrough should mention
The published guide mentions that the game has a chromatic aberration filter on by default, and that it can be disabled in the graphics settings. The same source notes that console editions also allow players to remove motion blur and film grain effects. These three filters are small but noticeable, and turning them off is the fastest quality-of-life improvement most players can make.
Performance is consistent with the platform you are on. The guide is based on the PS4 and PC versions, and the PS4 build is described as working correctly most of the time, with minor glitches and animation slowdowns caused by background texture loading. If you see a stutter during a boss cutscene, that is the texture streaming working as intended, not a bug.
Length, completion, and what to do after the credits
The guide estimates the campaign at “over a dozen hours” for a first playthrough, with the final number depending on how much time you spend on additional activities like exploring planets and battling optional bosses. That figure lines up with the metroidvania design: the critical path is short, but the backtracking and the optional layer inflate the time meaningfully.
After the credits, the game lets you continue. The guide confirms that you can return to the main menu, select the continue option, and resume from the Mantis at the moment before the final events. You will not be able to revisit the last location of the campaign, but there are no secrets there, and you can travel back to all other planets to clean up collectibles and side activities.
How a jedi fallen order walkthrough fits into a player’s toolset
The honest answer is that a walkthrough is most useful as a reference, not as a script. The structure of the game is forgiving, the combat is learnable, and the puzzles are designed to be solved with observation. A good walkthrough marks the things you cannot solve yet, names the bosses you cannot skip, and reminds you of the small inputs that the game does not always telegraph, like the dedicated climb button or the BD-1 holomap fix. It does not need to play the game for you.
For developers interested in how the campaign is constructed, the same walkthrough doubles as a study of the metroidvania pacing model. Planets are gated by abilities, abilities are gated by story, story is gated by bosses, and bosses are gated by skill. Reading a jedi fallen order walkthrough in that order is a fast way to internalize the rhythm before you design the next campaign yourself.
Internal references
Frequently asked questions
How long is the jedi fallen order walkthrough from start to finish?
The first playthrough is described in the published guide as taking “over a dozen hours.” The exact number depends on how much optional content you clear, including extra bosses, full planet exploration, and the Zeffo tombs. A clean critical path is faster, while a completionist run can extend well beyond twenty hours.
Do enemies respawn in the jedi fallen order walkthrough?
Ordinary enemies respawn when you rest at a meditation point. The guide compares the mechanic to games in the Dark Souls family. Defeated bosses do not respawn, so once a named encounter is over, the arena stays clear for the rest of that save file.
Can you keep playing after the final boss?
Yes. After the credits, the game returns you to the main menu and offers a continue option. You resume on the Mantis at the moment before the final events. You cannot revisit the last location, but every other planet stays accessible for cleanup.
Is the jedi fallen order walkthrough the same on every platform?
The story, the boss list, and the planet order are identical across PS4, Xbox One, and PC. The verified guide was written against the PS4 and PC versions, and it notes minor glitches and animation slowdowns on the base PS4 hardware caused by background texture loading. Those are cosmetic issues, not progression blocks.
What should I do if the holomap will not open on Bogano?
This is a known and intentional moment. The guide describes a state where BD-1 is busy, which prevents the holomap from opening. The fix is to follow the main story forward until the cutscene that fixes BD-1 plays. After that, the holomap and BD-1’s healing ability work normally.
Is the prologue fight against the Second Sister a real boss?
It is a scripted encounter rather than a winnable fight. The guide explains that Cal cannot defeat her because doing so is part of the plot. The fight ends automatically when Cal loses all his health or after a short scripted timer, and a cutscene carries him off the planet.
Are there any microtransactions in the game?
No. The guide is explicit that there are no microtransactions, boosters, loot boxes, or other elements that require additional purchase. Cosmetics, including outfits, skins, and Stinger Mantis paint jobs, are earned through exploration and progression.
Why does Cal fall off a wall when I try to climb?
Climbing in the game is not fully automatic. The guide notes that you must press a dedicated button, often the left trigger on consoles, to grab climbable objects like rods and plants. If you skip that input, Cal can land back on the ground or fall into an abyss.
Can you swim and explore underwater?
Yes, Cal can swim. Falling into water does not kill him, and later abilities open underwater areas that were inaccessible during the early game. The guide confirms that swimming is required for some main story sections and for a number of optional collectibles.
Where can I find a reliable jedi fallen order walkthrough online?
Independent written walkthroughs, including the one maintained at gamepressure.com, cover the full campaign, the boss list, the collectible layer, and the system settings. Pair a written walkthrough with a notebook for marking doors you cannot open yet, and the campaign becomes much easier to clear in a single pass.
Leave a Reply