
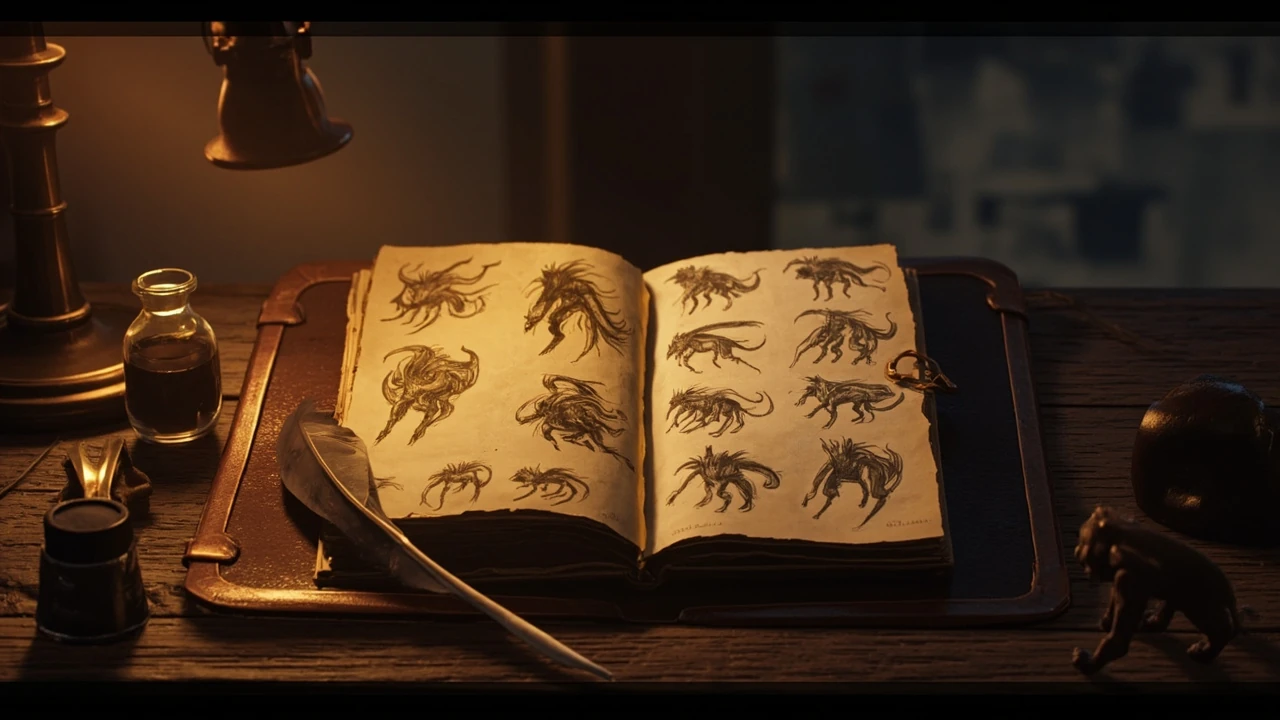
Monoco skills in Clair Obscur: Expedition 33
Monoco is the only party member in Clair Obscur: Expedition 33 whose entire moveset is built from the enemies you have already defeated. Every skill on his page in the menu corresponds to a specific monster type, which means building a strong Monoco build is less about a fixed progression tree and more about which encounters you choose to chase first. The learning system also creates a built-in completion checklist: if a row is missing in his skill list, the source you need is an enemy you have not yet fought with Monoco on the field.
Understanding how that loop works is the difference between a Monoco who feels limited early and a Monoco who can carry fights by the mid-game. This guide walks through how the skill system functions, the practical rules that govern learning, the most reliable farming spots for missing skills, and the design reasons a character like Monoco exists at all in a turn-based RPG.
How Monoco’s skill learning system works
Monoco’s kit is filled out organically through combat. Each enemy in the game is associated with a single Monoco skill, and defeating that enemy while Monoco is an active party member teaches him that skill. Once learned, the skill is permanently added to his repertoire and can be equipped from the same Expedition 33 menu that lists his other abilities.
The practical implication is that Monoco’s ceiling scales directly with your encounter coverage. A player who rushes the main story will have a small, situational kit. A player who backtracks into optional zones, revisits arenas, or pushes into the post-game Endless Tower will see Monoco’s skill list grow into a wide toolbox of single-target strikes, area attacks, buffs, and reactive abilities.
The active-party rule
Monoco must be in the active party when an enemy dies for the associated skill to register. The game’s reference material is explicit about this: he does not need to land the killing blow, but he cannot be parked in reserve. If you want a clean way to remember the rule, think of it as “present in the fight, not in the back pocket.” If you swap him out before the finishing hit, the skill simply does not unlock, and the next time you face that enemy you have to repeat the encounter.
There is no on-screen prompt that tells you a skill was learned. The confirmation is the appearance of a new entry in Monoco’s skill menu, which makes it worth opening the page after every new region to see what has changed.
Skill order, menu layout, and what to expect
The skill list on Monoco’s page mirrors the in-game ordering, so comparing your list to a complete reference is a quick way to find gaps. Skills are grouped roughly by the enemy family that grants them, which means missing rows tend to cluster: if you have no Sakapatate skills, you have not yet fought a Sakapatate variant with Monoco active. The Endless Tower is designed as a late-game catch-up tool, offering most of the skills again in a single location once it is unlocked.
Where to find every Monoco skill
The fastest route to filling out Monoco’s skill list is to anchor farming runs around a handful of high-density zones. Several of those zones sit close to Monoco’s Station on the world map, which makes them ideal when you are still learning the system. The list below uses the most accessible encounter for each enemy and groups skills by region so you can plan a route rather than bouncing across the map.
Skills learned near Monoco’s Station
This cluster is the single most efficient farming hub in the early-to-mid game, because five distinct enemy types can be reached on foot in a short loop around the station. Each skill below comes from a different enemy family, so a single circuit can teach Monoco several new moves.
- Chalier skill: found northwest of Monoco’s Station, fighting alongside a Pelerin and a Reaper Cultist.
- Stalact skill: found just east of Monoco’s Station via Esquie flight, alongside a Glaise and an Echassier.
- Pelerin skill: same northwest spot as the Chalier, in the same group encounter.
- Ramasseur skill: found northeast of Monoco’s Station with a Pelerin and a Greatsword Cultist.
- Troubadour skill: found southeast of the station alongside a Gault and a Demineur.
- Demineur skill: same southeast group as the Troubadour, useful when chaining a single fight for two skills.
- Echassier skill: same east-of-station group as the Stalact.
- Greatsword Cultist skill: same northeast group as the Ramasseur.
- Reaper Cultist skill: same northwest group as the Chalier and Pelerin.
- Cruler skill: just south of Monoco’s Station, with a Jar and a Chalier.
Skills learned on the Gestral Beach and shoreline
The coastal zone west and northeast of the Gestral village is a strong secondary hub. It offers a different set of enemy families from the station cluster, which is helpful once the station loop stops giving you new rows in Monoco’s menu.
- Braseleur skill: on the beach west of Monoco’s Station, west of the Gestral Beach, with a Sapling and a Rocher.
- Rocher skill: same west-of-station beach group as the Braseleur.
- Bruler skill: on the beach northeast of Gestral Village, with a Volester and a Hexga.
Skills learned in Old Lumiere and Forgotten Battlefield
Old Lumiere and the Forgotten Battlefield serve as the mid-game expansion for Monoco’s kit. They introduce armored and elite enemy types that grant skills with a heavier combat identity, which makes them useful when you want a tankier or more reactive Monoco build.
- Portier skill: southeast of Old Lumiere, with a Hexga and a Ceramic Chevalier.
- Chevaliere skill: within Old Lumiere itself.
- Gold Chevaliere skill: inside Stone Wave Cliffs.
- Hexga skill: same southeast-of-Old-Lumiere group as the Portier.
- Abbest skill: just east of the Forgotten Battlefield, alongside a Potier and a Ramasseur.
- Lancelier skill: north of Spring Meadows, with an Abbest and a Volester.
Skills learned in the Sirene and Flying Waters zones
The Sirene area is one of the few zones in the game designed around a single enemy family, and that makes it a one-stop shop for the Ballet skill. Flying Waters gives access to a more reactive skill set that complements what you have already learned.
- Ballet skill: throughout the Sirene zone, where dozens of Ballets appear in a small area.
- Luster skill: between Flying Waters and Gestral Village, with a Bruler and a Portier.
Skills learned in the frozen north and Chromatic zones
The northern half of the world map introduces enemy families tied to ice, shields, and rarer monster variants. These are higher-HP fights, so they tend to slot in around the time you already have a working Monoco core and want to round it out.
- Boucheclier skill: northeast of Frozen Hearts, in a small section of yellow trees, alongside a Chalier and a Rocher.
- Contorsionniste skill: in the red forested area by the Endless Night Sanctuary, with a Jar and a Braseleur.
- Chapelier skill: on the eastern shore with the Chromatic Petank, alongside a Benisseur and a Stalact.
- Benisseur skill: same eastern shore group as the Chapelier.
Skills learned from bosses and named enemies
Several Monoco skills are tied to encounters that function as mini-bosses or story-critical fights. These are normally the rows that players miss first, because they cannot be ground out at Monoco’s Station the way common enemies can.
- Duallist skill: found as a boss in the Flying Manor, where it is one of the fights required to unlock a late-game area, and also available in Stage 11, Trial 1 of the Endless Tower.
- Lampmaster skill: in the Painting Workshop, or as a backup in Stage 11, Trial 2 of the Endless Tower.
- Grosse Tete skill: a rare enemy outside Coastal Cave that gates a specific move; if the original is already defeated, another can be reached in Flying Manor by climbing the left handholds from the central area, descending the left rope past a Stalact, grappling across the gap, and climbing the next rope.
Skills learned in the Endless Tower
The Endless Tower is the catch-up layer of the skill system. Once unlocked, it offers a single location where most of Monoco’s missing skills can be re-learned without crossing the entire world map. The relevant entries sit in specific trials, which makes the tower a checklist-friendly location for completionists.
- Duallist skill: Stage 11, Trial 1.
- Lampmaster skill: Stage 11, Trial 2.
- Eveque skills: Stages 9, Trials 1, 2, and 3, with a Frost Eveque variant available on The Continent.
- Catapult Sakapatate skill: Stage 4, Trial 3, and also throughout Ancient Sanctuary.
- Robust Sakapatate skill: Stage 8, Trial 1, and also throughout Ancient Sanctuary.
- Ultimate Sakapatate skill: Stage 7, Trial 3.
Skills learned in the late-game zones
The last cluster of skills is tied to the story’s late areas. They are the easiest to miss on a first playthrough because the player often rushes through them during a story beat, then does not return.
- Creations skill: encountered in Renoir’s Drafts, and again on the return to Lumiere near the end of the game.
- Aberration skill: also found in Renoir’s Drafts.
- Orphelin skill: throughout the opening area of The Reacher, and also in Renoir’s Drafts.
- Ranger and Robust Sakapatate skills: throughout Ancient Sanctuary, which doubles as a Sakapatate farming area beyond the Endless Tower.
How the Sakapatate and Cultist families expand the kit
Three families deserve a separate mention because they each appear in multiple variants, and each variant teaches a different Monoco skill. Treating them as families rather than individual enemies makes the learning loop much easier to plan.
Sakapatate variants
The Sakapatate family acts as a self-contained archetype set. Catapult, Ranger, Robust, and Ultimate variants each contribute a distinct Monoco skill, and several of them share the same zone. Ancient Sanctuary is the most reliable single location for Ranger, Robust, and Catapult, while the Endless Tower provides every variant if you want one-stop farming.
Cultist variants
Greatsword Cultist and Reaper Cultist both sit in the Monoco’s Station cluster, which means a single short circuit can teach two related skills without any fast-travel setup. Their skills tend to complement each other in practice, which is part of why the station loop remains useful well into the mid-game.
Chevaliere family
The Chevaliere, Gold Chevaliere, and Ceramic Chevalier form an armored archetype set. The first two teach their own Monoco skills, and Ceramic Chevalier appears in the same Old Lumiere group as the Portier and Hexga, so the Chevaliere row of Monoco’s menu can be partially filled in a single visit to that region.
Putting Monoco skills into a party build
Monoco’s skill list is wide but not infinite, so the practical question is which rows to prioritize when you cannot equip everything at once. The skill system rewards players who build a Monoco loadout around a single combat role rather than trying to cover every situation.
Choosing a role for Monoco
Because each enemy teaches a specific skill, the most efficient way to play Monoco is to pick a target role early and farm the enemies that support it. A damage-focused Monoco will prioritize the Sakapatate family and the heavier single-target skills. A reactive Monoco leans on the Boucheclier, Contorsionniste, and Cultist rows. A support-leaning Monoco picks up the Ballet and Troubadour skills, both of which come from enemy families that group well in their own zones.
Swapping skills in and out of combat
Skills can be equipped from Monoco’s menu, and the menu is normally accessible from the main screen rather than mid-fight, so swapping in a counter skill for a specific encounter is part of the intended flow. Because the list grows as you progress, the practical rhythm is to revisit the menu after each new region and reassign skills to match the enemies you expect to face next.
Common pitfalls when farming Monoco skills
Most issues with Monoco’s skill list come from breaking one of the system’s two simple rules. The list below covers the failure modes that show up most often in a first playthrough.
- Forgetting the active-party rule. Monoco in the reserve slot means the skill does not register, even if the rest of the party wins the fight.
- Skipping the Endless Tower. Several skills are only convenient to obtain there, and the tower exists specifically as a backstop for missed encounters.
- Overlooking the station cluster. A short loop around Monoco’s Station can teach nine or more skills in a single play session, but it is easy to ignore once the main quest moves on.
- Missing the story-critical boss skills. Duallist, Lampmaster, and Grosse Tete each gate a Monoco row that is not available at Monoco’s Station, so they are the most common gaps in a casual run.
- Ignoring the Sakapatate family. Because Sakapatates appear in several variants, players who only fight the standard version of the enemy will miss rows that the variants would have taught.
How Monoco’s design fits Clair Obscur’s combat
Monoco’s learning system is a design choice that has consequences beyond his own character. In a turn-based RPG that already includes a fixed protagonist and a roster of named allies, giving one slot to a character who literally grows from the player’s encounter log is a way to make exploration and optional combat feel mechanically rewarded.
Each monster type doubling as a potential skill source also creates a soft form of documentation. The bestiary, the skill menu, and the world map are all checking the same source of truth: which enemies you have actually fought with Monoco on the field. That overlap means Monoco’s progression is a record of the player’s journey, not a separate progression track layered on top of it.
Why the Endless Tower exists
Endgame content in many RPGs exists to extend playtime. In Clair Obscur, the Endless Tower also exists to repair a soft failure state: a Monoco whose skill list is incomplete because the player progressed past certain enemies too quickly. By staging most of those enemies again as tower trials, the game gives players a way to fill the remaining rows without replaying earlier zones or hunting down every rare spawn.
Why the active-party rule is strict
If the rule allowed Monoco to learn skills from the reserve, the system would lose its connection to player behavior. Enforcing the active-party rule keeps the skill list honest: a row only appears if the player was actually present in the fight, which means the system rewards engagement rather than optimization.
Quick reference table for Monoco’s skill sources
The table below condenses the most reliable farming spot for each enemy that teaches a Monoco skill. Use it as a checklist when comparing your in-game menu against a full reference, and to plan efficient farming routes between regions.
| Enemy | Most accessible farming location | Region |
|---|---|---|
| Chalier | Northwest of Monoco’s Station, with Pelerin and Reaper Cultist | Monoco’s Station |
| Stalact | East of Monoco’s Station via Esquie flight, with Glaise and Echassier | Monoco’s Station |
| Pelerin | Northwest of Monoco’s Station | Monoco’s Station |
| Ramasseur | Northeast of Monoco’s Station, with Pelerin and Greatsword Cultist | Monoco’s Station |
| Troubadour | Southeast of Monoco’s Station, with Gault and Demineur | Monoco’s Station |
| Demineur | Southeast of Monoco’s Station | Monoco’s Station |
| Echassier | East of Monoco’s Station via Esquie flight | Monoco’s Station |
| Greatsword Cultist | Northeast of Monoco’s Station | Monoco’s Station |
| Reaper Cultist | Northwest of Monoco’s Station | Monoco’s Station |
| Cruler | South of Monoco’s Station, with Jar and Chalier | Monoco’s Station |
| Braseleur | Beach west of Monoco’s Station, with Sapling and Rocher | Gestral Beach |
| Rocher | Beach west of Monoco’s Station | Gestral Beach |
| Bruler | Beach northeast of Gestral Village, with Volester and Hexga | Gestral Beach |
| Portier | Southeast of Old Lumiere, with Hexga and Ceramic Chevalier | Old Lumiere |
| Chevaliere | Within Old Lumiere | Old Lumiere |
| Gold Chevaliere | Within Stone Wave Cliffs | Stone Wave Cliffs |
| Hexga | Southeast of Old Lumiere | Old Lumiere |
| Abbest | East of Forgotten Battlefield, with Potier and Ramasseur | Forgotten Battlefield |
| Lancelier | North of Spring Meadows, with Abbest and Volester | Spring Meadows |
| Ballet | Throughout the Sirene zone | Sirene |
| Luster | Between Flying Waters and Gestral Village | Flying Waters |
| Boucheclier | Northeast of Frozen Hearts, in yellow trees, with Chalier and Rocher | Frozen Hearts |
| Contorsionniste | Red forested area by Endless Night Sanctuary, with Jar and Braseleur | Endless Night Sanctuary |
| Chapelier | Eastern shore with Chromatic Petank, with Benisseur and Stalact | Eastern shore |
| Benisseur | Same eastern shore group as the Chapelier | Eastern shore |
| Duallist | Boss in Flying Manor; also Stage 11, Trial 1 in Endless Tower | Flying Manor / Endless Tower |
| Lampmaster | Painting Workshop; also Stage 11, Trial 2 in Endless Tower | Painting Workshop / Endless Tower |
| Grosse Tete | Outside Coastal Cave entrance, or in Flying Manor via the left handholds and rope path | Coastal Cave / Flying Manor |
| Creations | Renoir’s Drafts; also on return to Lumiere late in the game | Renoir’s Drafts / Lumiere |
| Aberration | Renoir’s Drafts | Renoir’s Drafts |
| Orphelin | Opening area of The Reacher, and Renoir’s Drafts | The Reacher / Renoir’s Drafts |
| Catapult Sakapatate | Stage 4, Trial 3 in Endless Tower; also Ancient Sanctuary | Endless Tower / Ancient Sanctuary |
| Ranger Sakapatate | Ancient Sanctuary | Ancient Sanctuary |
| Robust Sakapatate | Stage 8, Trial 1 in Endless Tower; also Ancient Sanctuary | Endless Tower / Ancient Sanctuary |
| Ultimate Sakapatate | Stage 7, Trial 3 in Endless Tower | Endless Tower |
| Eveque | Stages 9, Trials 1, 2, and 3 in Endless Tower; Frost Eveque on The Continent | Endless Tower / The Continent |
Comparing Monoco’s skill sources by play phase
Not every Monoco skill is convenient to obtain at the same point in the game. The table below groups skills by the phase where they are most realistically learned, which is often more useful than a pure regional map when planning a run.
| Play phase | Recommended Monoco skills to prioritize | Why this phase |
|---|---|---|
| Early to mid game | Chalier, Pelerin, Reaper Cultist, Stalact, Echassier, Ramasseur, Greatsword Cultist, Troubadour, Demineur, Cruler | All obtainable in the Monoco’s Station cluster, in a short on-foot loop |
| Mid game | Braseleur, Rocher, Bruler, Portier, Chevaliere, Gold Chevaliere, Hexga, Abbest, Lancelier, Luster | Found across Old Lumiere, Stone Wave Cliffs, Forgotten Battlefield, Spring Meadows, and Flying Waters |
| Late game | Ballet, Boucheclier, Contorsionniste, Chapelier, Benisseur, Duallist, Lampmaster, Grosse Tete, Creations, Aberration, Orphelin | Tied to Sirene, Frozen Hearts, Endless Night Sanctuary, the eastern shore, Flying Manor, Coastal Cave, Renoir’s Drafts, and The Reacher |
| Post-game / Endless Tower | Catapult, Ranger, Robust, and Ultimate Sakapatate skills, plus most Eveque skills and any missing story skills | The Endless Tower stages most missing skills in one location, with Ancient Sanctuary as a secondary Sakapatate farm |
Verifying Monoco’s skill list in a single session
For a player who wants to fill the entire skill list in one focused session, the route below is the most efficient order given the locations above. It is not a story route, so it assumes the relevant fast-travel points and Esquie flight are already unlocked.
- Start at Monoco’s Station and run a short clockwise loop covering the northwest, northeast, east, southeast, and south groups to learn Chalier, Pelerin, Reaper Cultist, Ramasseur, Greatsword Cultist, Stalact, Echassier, Troubadour, Demineur, and Cruler skills.
- Take Esquie flight to the beach west of the station, then northeast of Gestral Village, to pick up Braseleur, Rocher, and Bruler skills in a single sweep.
- Travel to Old Lumiere and Stone Wave Cliffs for Portier, Chevaliere, Gold Chevaliere, and Hexga skills, then detour east of the Forgotten Battlefield and north of Spring Meadows for Abbest and Lancelier skills.
- Visit the Sirene zone for the Ballet skill, then loop through Flying Waters for the Luster skill.
- Push north to Frozen Hearts for Boucheclier, then into the red forest by Endless Night Sanctuary for Contorsionniste, finishing on the eastern shore with the Chromatic Petank for Chapelier and Benisseur skills.
- Clear the boss-tied skills in Flying Manor (Duallist, Lampmaster, and the alternative Grosse Tete route), then revisit Coastal Cave if the original Grosse Tete is still available.
- Finish any remaining rows in Renoir’s Drafts and on the return to Lumiere for Creations, Aberration, and Orphelin skills.
- Enter the Endless Tower to fill in any missing Sakapatate variants, Eveque skills, and any rows the earlier route could not cover.
At the end of that route, the only rows that may still be missing are the ones tied to encounters you actively chose to skip, such as a particular rare spawn or a story boss you did not fight with Monoco on the field. Those rows are best filled in by replaying the specific fight with Monoco in the active party, since the Endless Tower only stages most, not all, of the skills in the game.
Why a Monoco skill list is also a progression tracker
Because every row in Monoco’s menu corresponds to a defeated enemy, his skill list doubles as a personal bestiary progress tracker. Players who want a quick health check on their overall encounter coverage can open Monoco’s page and count the gaps. The gaps are always the next farming targets, which means the list is self-directing once you understand the system.
For designers and technical learners reading this as a case study, Monoco’s system is a useful example of how a single mechanic can do triple duty. It is a progression system, a checklist, and a soft completion metric, all without adding a separate UI. That kind of overlap is worth thinking about whenever a turn-based RPG needs to make optional combat feel meaningful rather than decorative.
A practical takeaway for build planning is that Monoco’s role in a party is decided as much by the regions you visit as by the skills you slot. A player who focuses on the Monoco’s Station cluster will end up with a kit weighted toward the enemies that live in early zones, while a player who chases the Endless Tower and Renoir’s Drafts will end up with a more reactive, late-game-ready Monoco. The skill system rewards a wide path through the world rather than a single optimized line.
Frequently asked questions
How does Monoco learn skills in Clair Obscur: Expedition 33?
Monoco learns a skill whenever an enemy is defeated while he is an active party member. Each enemy family teaches a single, specific skill, which is added to his permanent skill list once the enemy is killed in his presence.
Does Monoco need to land the killing blow to learn a skill?
No. Monoco only needs to be part of the active party during the fight. As long as he is on the field when the enemy is defeated, the skill registers, even if another party member lands the final hit.
Can Monoco learn skills while sitting in the reserve?
No. The active-party rule is strict. If Monoco is not on the field when the enemy dies, the skill is not learned, and you will need to fight the same enemy again with Monoco in play to fill that row in his menu.
Where is the fastest place to farm Monoco skills early?
Monoco’s Station on the world map is the single best early hub. A short loop around the station covers ten distinct enemy types, including Chalier, Pelerin, Reaper Cultist, Stalact, Echassier, Ramasseur, Greatsword Cultist, Troubadour, Demineur, and Cruler, which means a single circuit can teach a large chunk of his kit.
What is the Endless Tower used for in terms of Monoco skills?
The Endless Tower is a post-game area that re-stages most of the enemies tied to Monoco skills, organized into numbered trials. It is designed as a catch-up location so that players who missed encounters earlier in the game can still complete his skill list without replaying the entire world map.
Which Monoco skills are easiest to miss?
The skills most often missed on a first run are the ones tied to boss-style encounters rather than common enemies. Duallist, Lampmaster, Grosse Tete, the Eveque family, and the various Sakapatate variants tend to be the rows players notice as missing last, because they require either a specific story fight or a dedicated Endless Tower clear.
Do Monoco skills carry over between playthroughs?
The reference material in the game treats the skill list as a per-save record tied to defeated enemies. Within a single playthrough, the skills Monoco learns are permanent and remain on his menu even if you switch the active party, which makes the skill list a reliable progression tracker from the moment you start filling it.
How can I tell which Monoco skills I am missing?
Open Monoco’s skill page from the main menu and compare the in-game ordering to a complete reference list. The page is laid out in the same order regardless of how you obtained the skills, so any blank rows correspond to enemies you have not yet defeated with Monoco on the field.
Is there a skill that only comes from a boss fight?
Yes. The Duallist skill is gated behind a boss encounter in the Flying Manor, and the Lampmaster skill is tied to the Painting Workshop boss. The Grosse Tete skill is also tied to a rare encounter outside Coastal Cave, though a backup Grosse Tete exists in Flying Manor once the original is defeated.
What should I do if a Monoco skill is still missing after the Endless Tower?
Check the active-party rule first, because the most common reason a skill does not register is having Monoco in the reserve slot during the fight. If the rule was respected, the skill is likely tied to a story or boss encounter that requires a specific trigger, such as a named enemy in Flying Manor, Renoir’s Drafts, or the return to Lumiere. Replaying that specific fight with Monoco on the field is the most reliable way to fill the remaining row.
Leave a Reply