
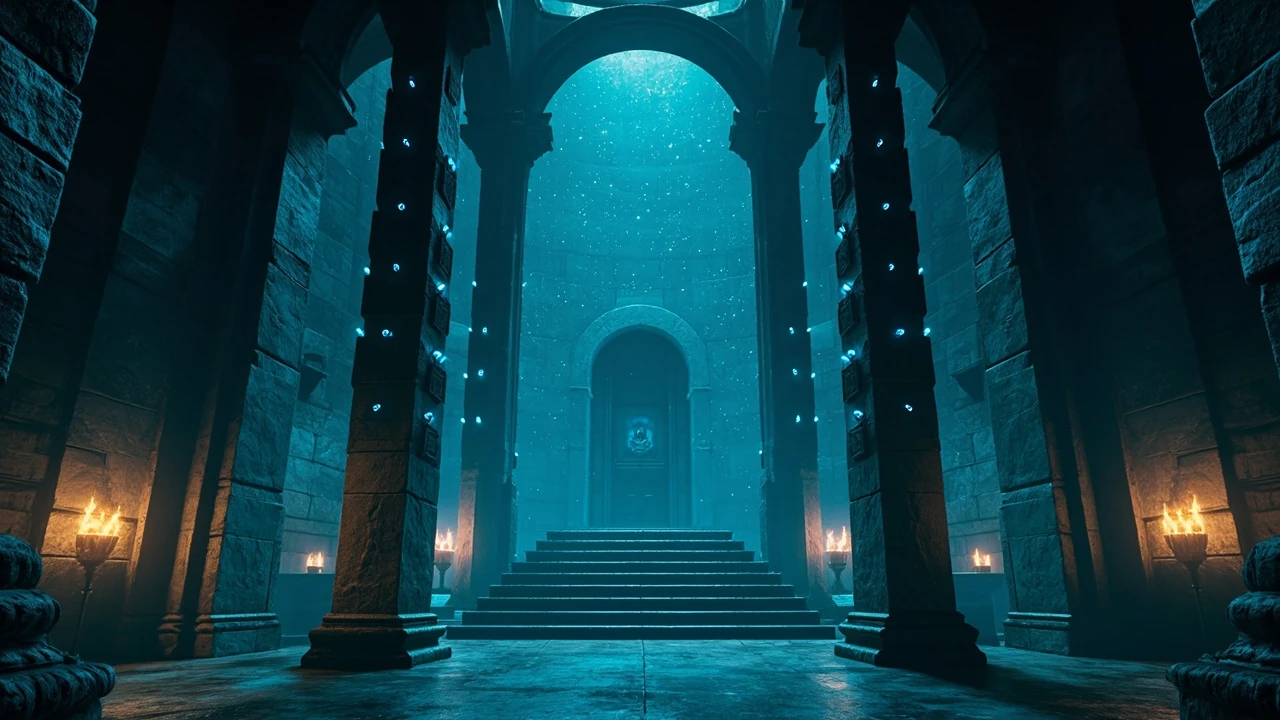
Keo Ruug Shrine puzzle walkthrough: spheres, constellations, and the Knight’s Claymore
The Keo Ruug Shrine sits inside the Great Hyrule Forest region of The Legend of Zelda: Breath of the Wild, and its design asks you to translate constellations on a far wall into a number of torches next to each column of sphere receptacles. Getting it wrong wastes a few minutes at most, but missing the second gate means leaving a Knight’s Claymore on the table and a Spirit Orb unclaimed, so the puzzle is worth a clean run rather than a guess. This walkthrough covers both gates in the order the room reveals them, explains the logic the inscription hints at, and flags the failure modes that cause most players to backtrack.
The shrine is a single interior chamber with a staircase down the middle. Two rows of receptacles face each other across the stairs, a far wall shows matching constellations, and a final chamber at the bottom holds the monk. The puzzle has two phases that share the same logic but use different orders, so treating them as one problem with two rounds is the most reliable approach. The walkthrough below separates them so you can solve the first gate, claim the chest behind the second gate, and then talk to the monk for the Spirit Orb.
What the inscription is actually telling you
When you step into the Keo Ruug Shrine, the first thing the room draws your eye to is the inscription above the stairs: “Look to the stars for guidance. The constellations are the key.” That line is the entire puzzle stated in plain language. The far wall is decorated with simple star patterns, and the same patterns appear next to the columns of sphere receptacles on either side. Each column also has a row of torches numbered one through five, and your job is to count how many times the relevant constellation appears on the far wall and place the sphere in the receptacle that matches that torch count.
The trick is to match the constellation, not the column. Players who try to solve each column independently get the order wrong because both columns are reading from the same far wall. Walk to the bottom of the stairs, face the far wall, and count first, then walk back up and place the spheres. Counting from a distance is also easier on the eyes than leaning against a column and trying to count while standing next to the torches. The inscription does not name the constellations, and it does not give a hint about the second gate, so the writing on the wall is the only written instruction you will get for the entire shrine.
How the sphere and torch system works
Each column of receptacles is a vertical stack of slots, and each slot sits next to a torch. The torches are not decorative; they are a visible counter. If a constellation appears three times on the far wall, the sphere for that column goes into the receptacle whose adjacent torch is the third one in the row. If it appears once, it goes into the slot next to the first torch, and so on up to five. The same rule applies to both gates, and the second gate reuses the same spheres rather than introducing new ones, which is why picking the spheres back up after the first gate matters.
This design is also why the puzzle is forgiving. There are only five possible positions per column, the count is always an integer between one and five, and the torches give you a built-in answer key. As long as you count carefully, the placement is mechanical. The mechanic is also why Breath of the Wild veterans tend to breeze through this room: the game uses a similar numeric scale, where a visible marker on a piece of scenery equals a quantity somewhere else, in several other shrines. The Keo Ruug Shrine is a clean, low-stakes example of that idea.
What the room looks like before you solve anything
Before the puzzle is solved, the shrine has a particular layout that helps you orient yourself. The entrance is at the top, the staircase runs down the center, and the two columns of receptacles flank the stairs in matching rows. The far wall at the bottom of the stairs carries the constellation field that drives the first gate, and a second constellation wall sits to the right of the staircase on a lower landing, behind the gate that leads to the chest. Both walls are lit by the same soft blue light the rest of the shrine uses, and the torches on the columns add a warm counterpoint in the lower half of the room.
When you first load in, the spheres are already in the room and the gates are sealed. There is no switch, no enemy, and no moving platform to clear first; the puzzle is the entire encounter. That is also why the Keo Ruug Shrine is a common first-clear for players who are still learning the rhythm of shrine puzzles: it gives you a clean, quiet room to think in, and it does not punish a wrong answer beyond a few seconds of walking back to the bottom of the stairs.
First gate: solving the entrance puzzle
The first gate sits at the top of the shrine, between you and the monk’s chamber. The two columns of receptacles line the staircase, and the gate stays sealed until the correct order is set on both sides. The room is built so that you can see the far wall clearly from the bottom of the stairs, and the columns are close enough to the gate that you can place both spheres in a single pass once you have counted correctly.
Step-by-step order for the entrance gate
- Walk to the bottom of the stairs and face the far wall so you can see the full constellation field without obstruction.
- Identify the constellation painted on the wall to the left, directly in front of the left column of receptacles, and count how many times that pattern repeats on the far wall.
- Turn and identify the matching constellation on the right, in front of the right column, and count its repetitions the same way.
- Walk back up to the spheres and place the left sphere into the receptacle whose adjacent torch number matches the left count.
- Place the right sphere into the receptacle whose adjacent torch number matches the right count.
- Confirm both spheres are seated and listen for the gate’s unlocking tone before descending.
Players occasionally misread the room by counting torches on the column instead of stars on the wall, or by matching a constellation to the wrong column. If the gate does not open after placement, lift the spheres, walk back to the far wall, and recount. The pattern is not randomized, so a recount always resolves the disagreement. The unlock tone is consistent across shrines, so once you have heard it on a previous puzzle, you will recognize it immediately here.
What the first gate unlocks
The entrance gate opens a path down the stairs to the monk, but it does not open the path to the treasure chest. Most players reach the monk, claim the Spirit Orb, and then leave without realizing that the chest sits behind a second sealed gate to the right of the staircase, on the same level as the entrance. The chest is the only reason to take the second pass through the puzzle, and its reward is genuinely useful for the early-to-mid game where a Knight’s Claymore can carry you through several combat encounters in the surrounding forest.
After the first gate opens, the spheres are still on the columns. Pick them up before you head for the chest, because the second puzzle uses the same spheres. The room is generous enough that a sphere cannot be lost permanently, but a dropped sphere does add unnecessary walking if you have to backtrack halfway up the stairs to retrieve one.
Second gate: reordering the spheres for the chest
The second gate is the easy one to miss. After you open the first gate, turn and look right, down the stairs. There is a second sealed door, and it sits in front of another wall of constellations with a fresh set of receptacles nearby. The shrine’s logic is consistent: the same constellation-to-count rule applies, but the order has changed because you are now reading from a different wall. The constellations on the second wall are not the same patterns you counted for the first gate, and their counts are not the same either.
Why the second puzzle needs a reorder
The Keo Ruug Shrine tests whether you understood the rule, not whether you remembered a specific arrangement. Once you have the pattern down, the second pass is faster than the first, because you already know to count on the far wall and match to the torches. The reorder exists so that solving the entrance by accident does not also solve the chest. You have to apply the same logic to a different set of constellations, and that is what the room is grading you on. In practice, this means a player who guessed correctly on the first gate still has to count carefully on the second, and a player who read the inscription the first time but did not internalize the rule will fail the second gate the same way they failed the first.
Step-by-step order for the chest gate
- After the first gate opens, turn right and walk down the right-hand side of the stairs until you can see the second constellation wall clearly.
- Identify the constellation nearest the left-hand receptacles for this second puzzle and count its occurrences on the wall.
- Repeat the count for the constellation nearest the right-hand receptacles.
- Place the left sphere into the receptacle next to the matching torch number for that count.
- Place the right sphere into the receptacle next to the matching torch number on the right.
- Listen for the unlock tone and open the gate to claim the chest.
Reward behind the second gate
The chest behind the second gate holds a Knight’s Claymore, a two-handed sword with respectable damage and decent durability for the point in the game where most players clear Great Hyrule Forest shrines. It is not a unique weapon, but it is a strong, reliable upgrade over the weapons you typically carry into the region, and the shrine’s chest is one of the more accessible sources for it. Two-handed swords are also useful in shrines where you need to break wooden crates, hit distant switches, or stagger larger enemies, so the Knight’s Claymore pulls weight beyond its raw damage number. Once the chest is open, the only thing left in the shrine is the monk.
Approaching the monk and claiming the Spirit Orb
With both gates open, walk down the central staircase to the monk. The monk, Keo Ruug, waits in the terminal chamber and grants a Spirit Orb when you speak to him. Spirit Orbs are the long-term currency for heart containers and stamina upgrades, so even a small shrine like this contributes to your overall build. There is no trick to the monk interaction; talking to him is the entire step, and the cutscene that follows is short.
The monk’s chamber is the same layout you will see in most Breath of the Wild shrines: a small circular room with a raised platform, the monk waiting in the center, and a single exit back to the overworld map once the conversation ends. Once the Spirit Orb is yours, the shrine fast-travel point activates on the map, which is useful if you want to drop back into Great Hyrule Forest later without re-traversing the route you used to reach the shrine on foot.
What the Spirit Orb is used for
Spirit Orbs are exchanged with the goddess statues scattered across Hyrule. Four orbs can be traded for either a heart container or a quarter-stamina wheel, so the practical value of the Keo Ruug Shrine is one quarter of either resource. That sounds modest, but the shrine is part of a dense cluster in Great Hyrule Forest, and the orbs add up quickly if you clear the surrounding shrines on the same route. The closest goddess statues tend to be near the edges of the forest and in the nearby stable, so the orb is rarely a wasted trip.
Common failure modes and how to avoid them
The Keo Ruug Shrine is short, but a few specific mistakes cost players time. The list below covers the failures that show up most often in player reports and forum threads, in the order they tend to happen during a first attempt.
Counting torches instead of constellations
The torches on each column are a numbering system, not a hint. If you place a sphere in the third receptacle because there are three torches in the column, you are using the wrong counter. Always count occurrences of the constellation on the far wall, then walk back and place by torch number. This mistake is more common on the first gate than on the second, because the first gate is the one where players are still reading the room for the first time.
Matching the wrong constellation to the wrong column
Both columns reference different constellations, and the two constellations are usually visible from the same vantage point at the bottom of the stairs. Players occasionally swap them, especially if they try to solve one column without looking at the other. Solve both counts before placing either sphere, and double-check the pattern you are counting against the column it sits in front of. The far wall has the matching constellation painted at the base of each column, and that small marker is the cleanest reference point.
Leaving the spheres on the ground
The spheres are physical objects. If you drop one, it rolls. After the first gate opens, pick the spheres back up before you head for the chest puzzle, or you will reach the second gate and have to backtrack to the first column to retrieve a sphere. The shrine is generous enough that you cannot lose a sphere permanently, but a dropped sphere does add unnecessary walking, and on a snowy or wet surface the sphere can roll further than you expect.
Forgetting the chest exists
The chest is the easiest thing to miss because the monk’s chamber is the more obvious reward and the gate to the chest is to the side. A quick 360-degree turn after the first gate opens is enough to catch it. If you have already spoken to the monk and are about to fast-travel out, do a slow turn first; the second gate is the difference between a Spirit Orb and a Spirit Orb plus a Knight’s Claymore. Several players report that they only found the chest on a second visit, after reading about the second gate in a guide.
Trying to read the constellations from too close
Constellations read better from a few meters back than from directly underneath. The patterns are large and stylized, and they overlap visually if you stand right under them. The bottom of the stairs is the cleanest vantage point for both gates, and it is where the room’s lighting makes the star patterns easiest to distinguish. If you have the option to step back, take it; the counts become much harder to fumble at a distance.
Quick reference for both gates
The table below summarizes the structure of each gate so you can re-enter the shrine and solve either side without rereading the room. Treat the constellation counts as something you recompute each time you play, since the wall is the only source of truth and the table is a logic summary rather than a fixed answer key.
| Gate | Source of truth | What to count | Where to place the sphere | Reward |
|---|---|---|---|---|
| Entrance gate (top of stairs) | Constellation wall visible from the bottom of the stairs | Occurrences of the constellation nearest each column | Receptacle whose adjacent torch matches the count (1 to 5) | Path to the monk and a Spirit Orb |
| Chest gate (right side of stairs) | Second constellation wall visible from the right-hand landing | Occurrences of the constellation nearest each receptacle for this puzzle | Receptacle whose adjacent torch matches the new count (1 to 5) | Knight’s Claymore inside the chest |
Second reference: counts versus torch position
The second table breaks down the relationship between a constellation’s count and the torch position that matches it. This is the mechanical core of the puzzle, and seeing it laid out flat makes the rule easier to apply when you are standing in the room. The mapping is fixed across both gates, so once you internalize it, the second pass through the shrine is faster than the first.
| Constellation count on the wall | Torch position on the column | Sphere placement |
|---|---|---|
| 1 | First torch from the top | Top receptacle on the column |
| 2 | Second torch from the top | Second receptacle from the top |
| 3 | Third torch from the top | Middle receptacle on the column |
| 4 | Fourth torch from the top | Fourth receptacle from the top |
| 5 | Fifth torch from the top | Bottom receptacle on the column |
How the Keo Ruug Shrine fits the Great Hyrule Forest region
The Great Hyrule Forest is a dense cluster of shrines built around the Master Sword quest, and the Keo Ruug Shrine is one of the simpler logic shrines in that cluster. It does not test combat, timing, or environmental puzzles, only pattern matching, which makes it a useful confidence-builder before shrines that ask for more involved setups. Players who plan a route through the forest often clear the Keo Ruug Shrine on the way to or from the sword’s pedestal, both because it is on a logical path and because the Knight’s Claymore is a meaningful upgrade for the forest’s enemies.
From a design standpoint, the shrine is also a useful illustration of how Breath of the Wild teaches mechanics without explicit text. The torches act as a numeric scale, the constellations act as a key, and the inscription acts as a written prompt. None of those three elements would be necessary on their own, but together they make the puzzle solvable on a first read for a careful player and recoverable on a second read for a player who guessed wrong. That layered design is what makes the shrine memorable even after you already know the answer, and it is one of the reasons the room shows up so often in lists of favorite puzzle shrines from the game.
What to do after clearing the shrine
Once the Spirit Orb is in hand and the Knight’s Claymore is equipped or stored, the practical next step is to keep moving through the Great Hyrule Forest cluster. The Keo Ruug Shrine gives you resources that compound across the rest of the region, and the surrounding shrines test mechanics the Keo Ruug Shrine does not, so clearing them in sequence keeps the difficulty curve moving upward at a steady pace. If you are already overburdened, the Knight’s Claymore is worth keeping in your inventory; two-handed swords of that tier are useful for the combat encounters in the forest and for several of the surrounding shrines.
If you want to use the orb immediately, the nearest goddess statue exchanges Spirit Orbs for hearts or stamina, so you can cash in without leaving the region. If you prefer to bank orbs for a larger upgrade, the Keo Ruug Shrine contributes cleanly to that strategy because the puzzle is short and the orb is guaranteed. The fast-travel point that activates when you finish the shrine also makes the location a useful base of operations while you work through the rest of the forest cluster.
Player checklist for the Keo Ruug Shrine
The list below condenses the walkthrough into a single pass you can run through before you enter. It is intentionally short because the puzzle is short, and each step maps to a specific moment in the room.
- Read the inscription above the stairs: constellations are the key.
- Walk to the bottom of the stairs and count each constellation’s occurrences on the far wall.
- Place each sphere in the receptacle whose torch number matches the count.
- Open the first gate, then turn right and look for the second gate down the stairs.
- Recount the constellations on the second wall and reorder the spheres.
- Open the chest for a Knight’s Claymore.
- Walk to the monk and claim the Spirit Orb.
Notes on the Knight’s Claymore in the wider game
The Knight’s Claymore is a recurring weapon in Breath of the Wild, and the version inside the Keo Ruug Shrine is the same weapon you can find on enemy knights in the overworld or in other shrines later on. The shrine copy is a clean, undamaged version with full durability, which is part of why players treat it as a useful pickup rather than a skip. Two-handed swords also feed into a few crafting and cooking recipes, and the Knight’s Claymore in particular has a damage profile that holds up against most enemies you meet in the early-to-mid game.
For players who prefer a different weapon loadout, the chest is still worth opening for completion tracking, even if the claymore ends up in storage. The shrine’s completion counter ticks up when the chest is open, and that is the cleanest way to make sure the room is fully cleared before you move on.
Frequently asked questions
Where is the Keo Ruug Shrine located?
The Keo Ruug Shrine is in the Great Hyrule Forest region of Breath of the Wild. It sits inside the forest proper, on the same general route that leads toward the Master Sword’s pedestal, which makes it a natural stop on any run that combines shrine clears with the sword quest. The shrine’s fast-travel point becomes available once you complete it, which is the easiest way to drop back into the area later.
Do I need any items to solve the Keo Ruug Shrine?
No. The puzzle is fully self-contained. The spheres are already in the room, the constellations are painted on the walls, and the torches act as a built-in number scale. You can enter the shrine with no equipment and solve both gates without using a weapon, a rune, or a consumable. Magnesis and the other runes are not required, which is part of why the room is a good first-clear for players who are still learning the rhythm of shrine puzzles.
What happens if I place the spheres in the wrong receptacles?
Nothing irreversible. The gate stays sealed and the spheres sit in the receptacles where you placed them. Lift them, walk back to the bottom of the stairs, recount the constellations on the far wall, and place them again. The puzzle is built to be retried without penalty, and there is no timer or combat pressure to make a wrong placement more costly than a slow correction.
Is the chest required for 100 percent completion?
Yes. Breath of the Wild tracks shrine chests separately from shrine completion, and a shrine counts as fully cleared only when the chest has been opened and the Spirit Orb has been claimed. The Keo Ruug Shrine is no exception, so leaving the chest behind counts against the shrine’s completion percentage even after you have the orb. Most completion trackers will flag the shrine as partial until the chest is open.
Can I miss the second gate if I leave after the Spirit Orb?
Yes, and that is the most common way players skip the chest. The second gate is on the right-hand side of the staircase, not directly in front of the monk, so a player who walks straight to the monk and then to the exit can miss it entirely. The fix is a slow turn after the first gate opens, before you talk to the monk. The gate is also sealed until the first puzzle is solved, so a player who solves the entrance by accident will still see the second gate once they turn around.
Is the Knight’s Claymore worth picking up?
For most players running through Great Hyrule Forest, yes. The Knight’s Claymore is a strong two-handed sword with damage and durability that outperform the weapons you usually carry into the region. It is not unique, but it is a clean upgrade that holds up across several combat encounters, and it is one of the more accessible sources for that tier of two-handed sword in the area. If you already have a comparable two-handed weapon equipped, the chest is still worth opening for completion tracking.
Do the constellations change between the two gates?
Yes. The entrance gate reads from the far wall at the bottom of the main staircase, and the chest gate reads from a different constellation wall on the right-hand side of the stairs. The logic is identical, but the specific patterns and their counts are not the same, which is why solving the first gate does not also solve the second. In practice, the second wall is smaller and easier to count, which is part of why the second pass feels faster once you know the rule.
Does the Keo Ruug Shrine respawn or rotate?
No. Breath of the Wild shrines are static encounters. Once you have cleared the puzzle, opened the chest, and claimed the Spirit Orb, the shrine stays cleared for that save file. There is no daily reset, no randomized layout, and no reason to revisit the shrine once the rewards are collected. The fast-travel point remains active, but the room itself does not regenerate its puzzle or its chest.
Can I solve the chest puzzle before the entrance gate?
No. The second gate is sealed until the entrance gate is open, and the spheres you need for the second puzzle are the same spheres you used for the first. The intended order is entrance gate first, chest gate second, and the room is laid out so that any other order is awkward. Following the intended order is also the fastest path through, because the spheres are already in the columns after the first gate opens and you can carry them straight to the second gate.
What is the Spirit Orb from Keo Ruug used for?
Spirit Orbs are exchanged with goddess statues for either heart containers or stamina upgrades. The orb from the Keo Ruug Shrine is one of four needed for either upgrade, so on its own it does not change your build, but it contributes cleanly to the next quarter-heart or quarter-stamina wheel you decide to claim. The goddess statues closest to Great Hyrule Forest are reachable on foot from the shrine, so the orb is rarely a wasted trip.
Does the Keo Ruug Shrine count toward the Master Sword quest?
No, not directly. The Master Sword quest is its own storyline, and clearing shrines in the surrounding area does not advance it. The Keo Ruug Shrine is useful as a waypoint and as a source of resources while you work through that quest, but the sword itself is obtained through the Lost Woods and the pedestal, not through shrine completion.
Leave a Reply